

[No.8] Master the Power of Repeating! Light Up LEDs One by One
Let's sharpen your programming skills so you can build all kinds of features with SPACEBLOCK, the tiny computer for making things. This time, you'll use the LED panel and one of the most basic programming skills: "repeating"!
What You Need & Getting Ready
- SPACEBLOCK Standard Package [SPACEBLOCK, USB cable, (battery box)]
- 8×8 RGB LED Matrix Panel (LED panel)
- A computer for programming
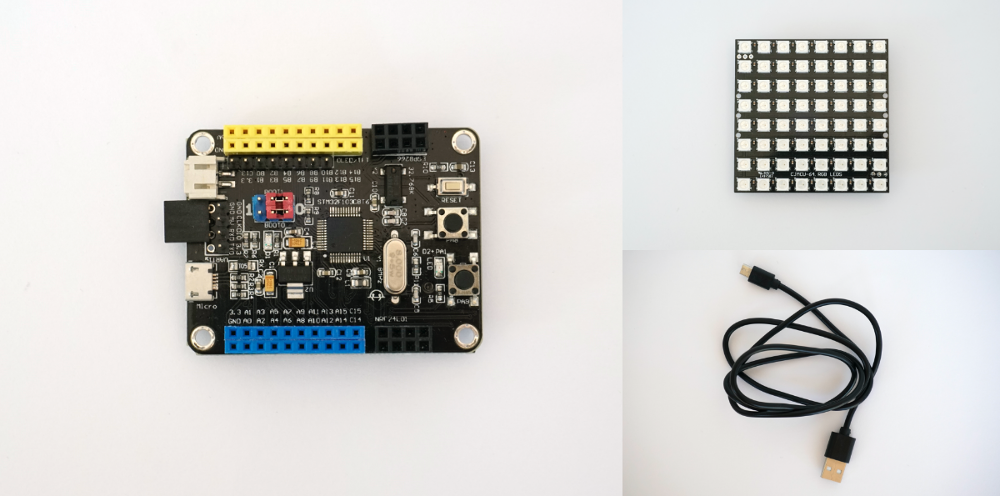
Connect the LED Panel to SPACEBLOCK
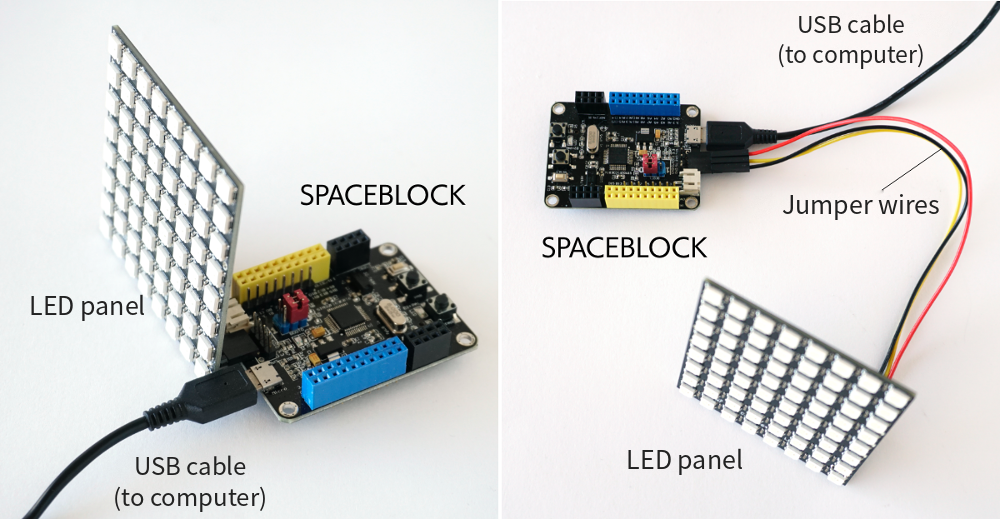
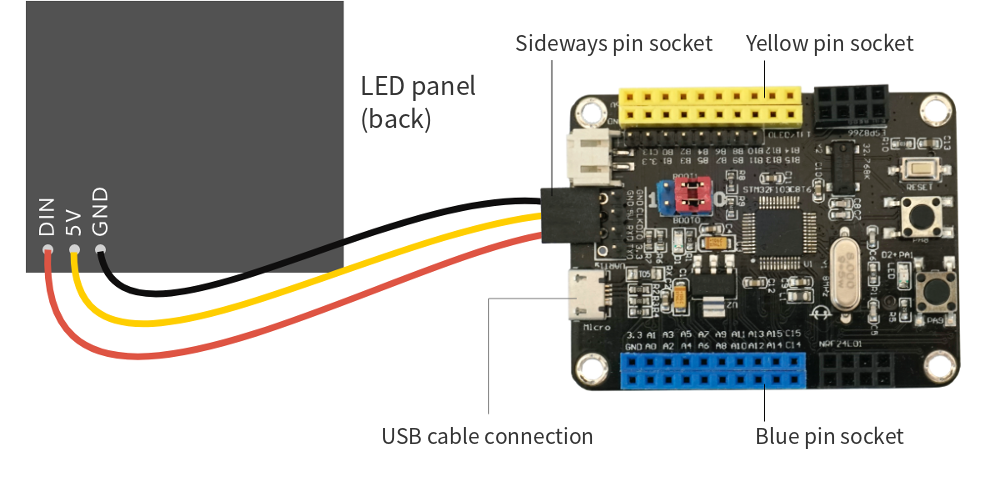
If you use jumper wires, look at the picture below for the details.
Show a Warning Sign
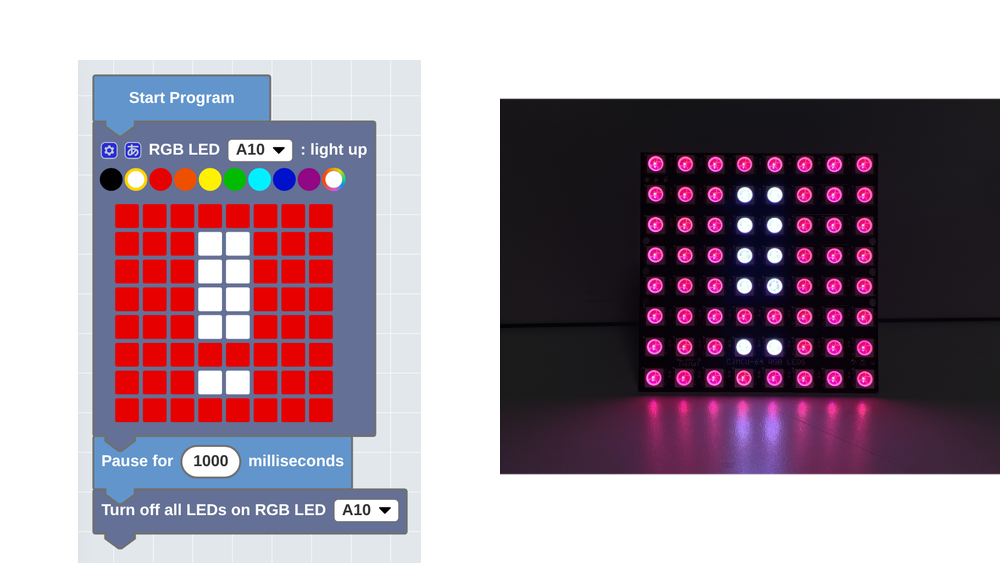
Now you have a program where the "!" mark lights up and turns off after 1 second. We want it to stand out more, so let's make the mark blink.
How Do You Make the Mark Blink?
Blinking means "on → off → on → off → on → off → on → off → on → off → on → off → on → off →" and so on. The pattern "on → off →" repeats again and again.
To repeat the same pattern of instructions, use the [Repeat] block in the "Loops" category. The [Repeat] block keeps running the instruction blocks you put inside it, over and over.
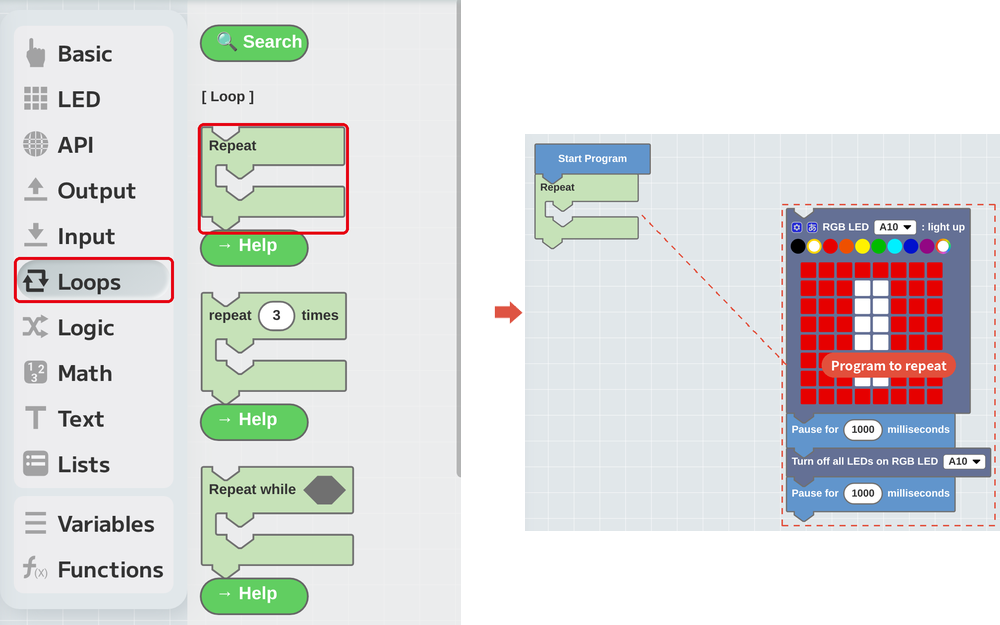
Attach a [Repeat] block to [Start Program], and build the program inside it as shown in the next picture.
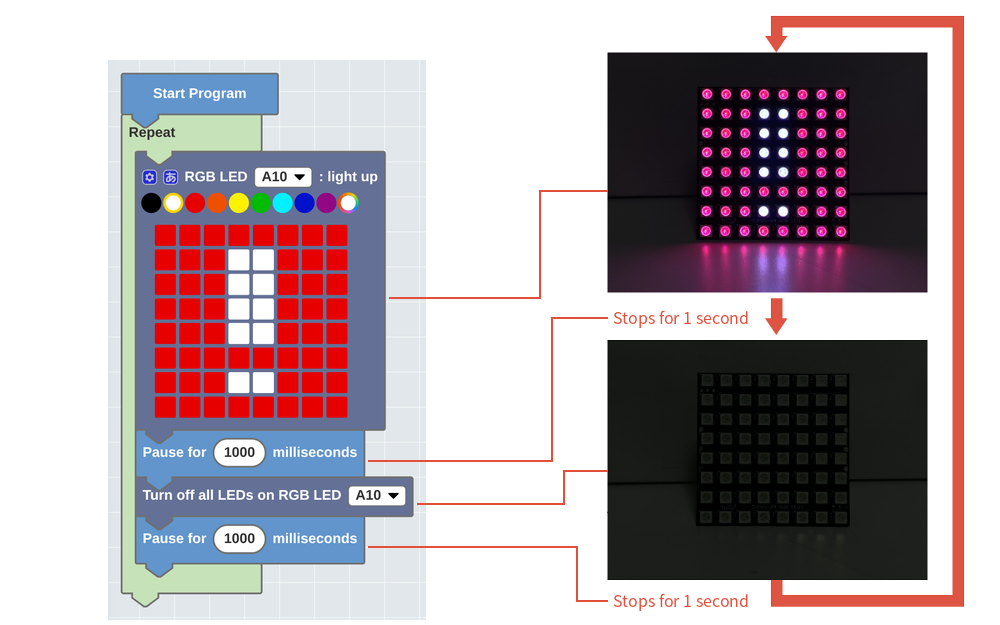
Let's watch it in the video.
How Do You Light Up the LEDs One at a Time?
Next, let's light up the LEDs on the panel one at a time, in order. The LED panel has 8×8, or 64, LEDs, and you can choose each one separately to turn it on or off.
To light up an LED at a certain position, use the [8 x 8 RGB LED (A10): light x (1) y (1) in (color)] block in the "LED" category. You set the position with an x coordinate and a y coordinate.
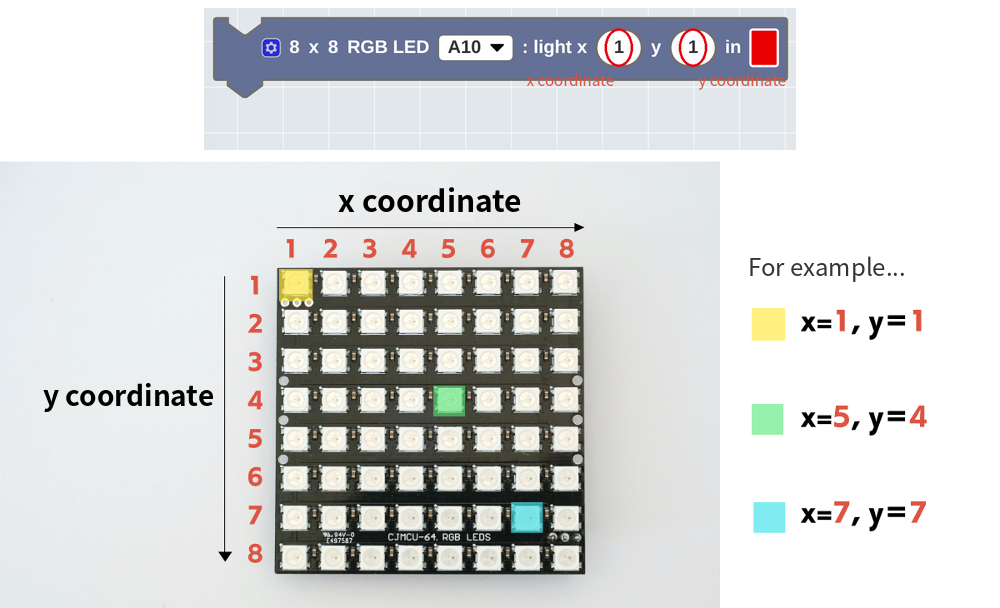
Light Up the 8 LEDs in a Row, One by One
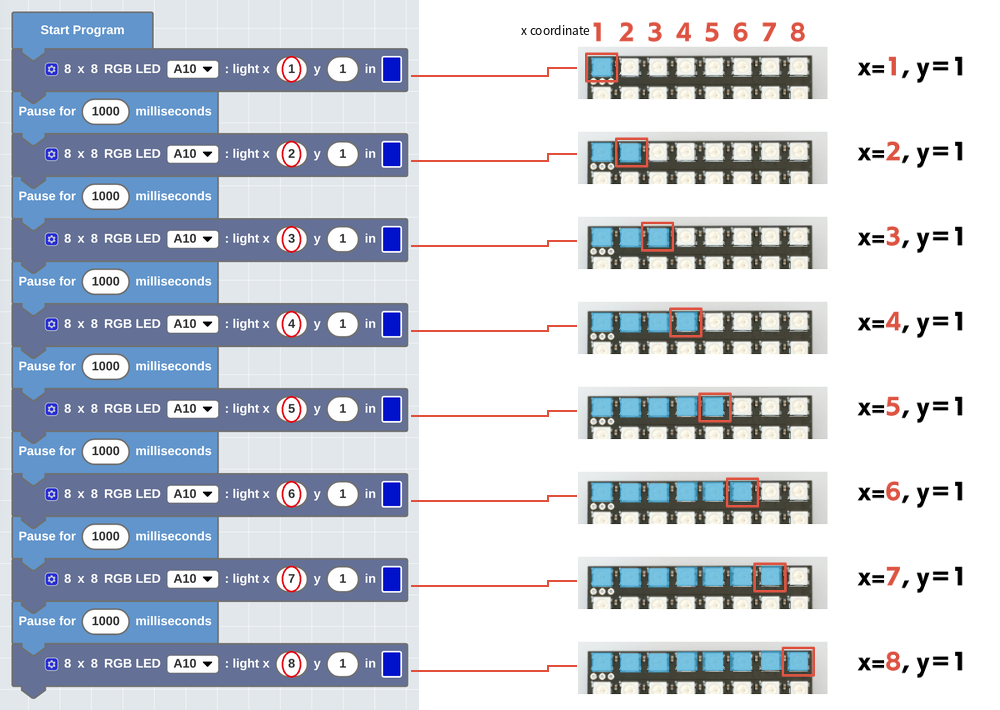
You can keep attaching instruction blocks like this, but as the number grows, building the program gets really hard.
If you look closely at the program, the same block is attached again and again, and only the x coordinate in the [8 x 8 RGB LED (A10): light x (1) y (1) in (color)] block is different. The x coordinate goes up by 1 each time, from 1 to 8. When something repeats while a value changes by a rule like this, you can build the program efficiently by using a "variable".
Work Smarter with Variables and Repeating!
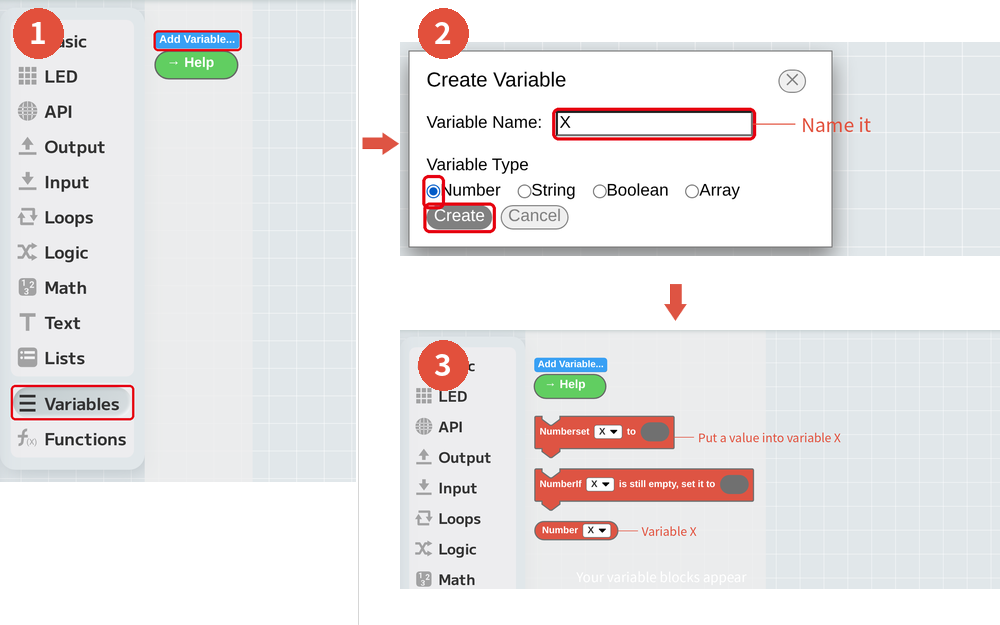
A "variable" is a container that can hold a value, and you can give it any name you like. You can change the value stored in a variable while the program is running.
First, make a new variable by following the steps in the next picture. Name it "X."
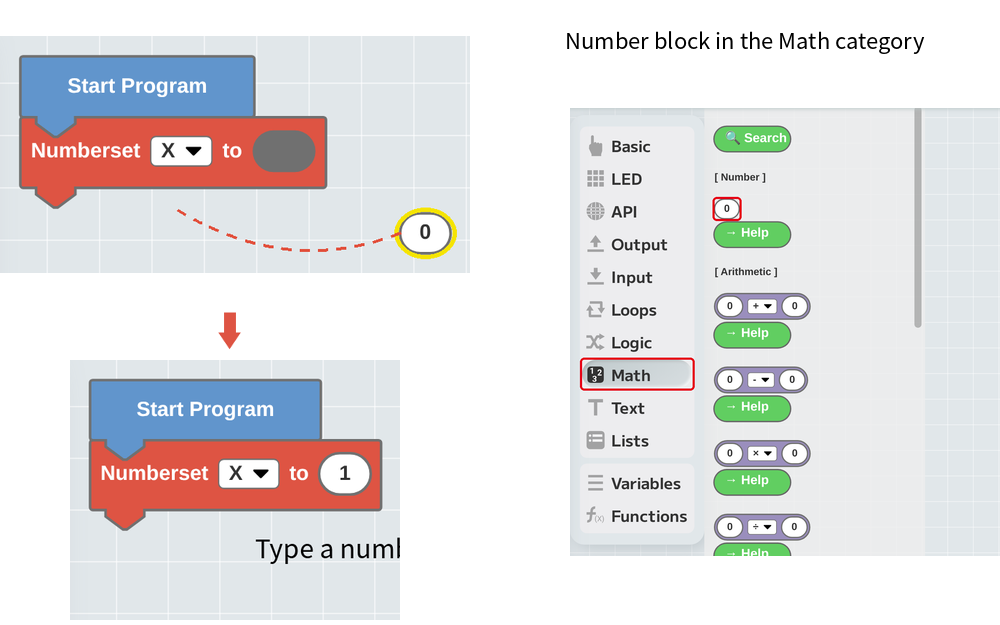
Next, put "1" into the variable "X" you just made as its starting value. As in the next picture, attach a [Number set (X) to ( )] block to the [Start Program] block and set it to 1.
Now, use repeating to build a program that lights up just the top row of the LED panel from left to right. As in the next picture, build the program inside a [repeat (8) times] block.
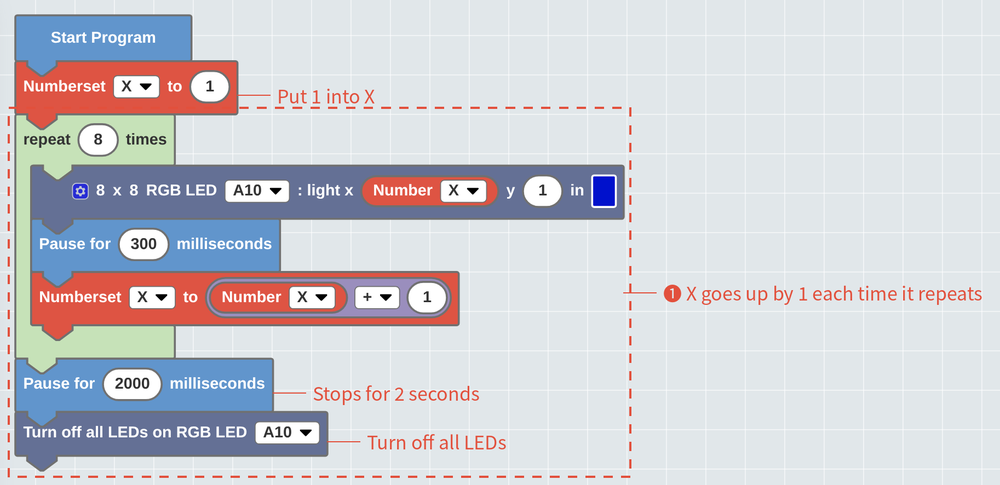
<How the Program Works>
❶ Use the variable "X" as the x coordinate in the [8 x 8 RGB LED (A10): light x (1) y (1) in (color)] block. Whatever value is in "X" when the program runs becomes the x coordinate.
❷ Put the value of "X" plus 1 into the variable "X." Each time it repeats, the value in "X" goes up by 1.
Use the next picture to imagine how the value in "X" changes.
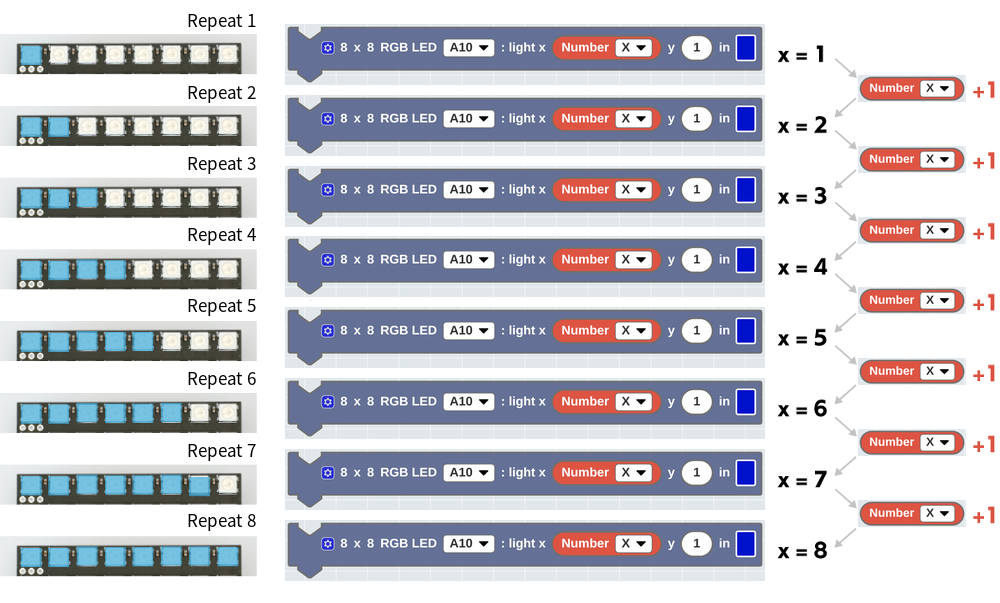
Run the program, and the 8 LEDs in row 1 light up one by one from the left.
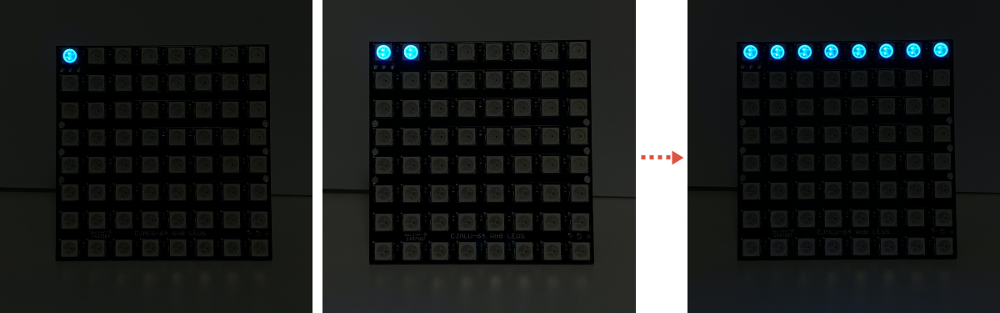
Watch it in the video.
Light Up All the LEDs in Order
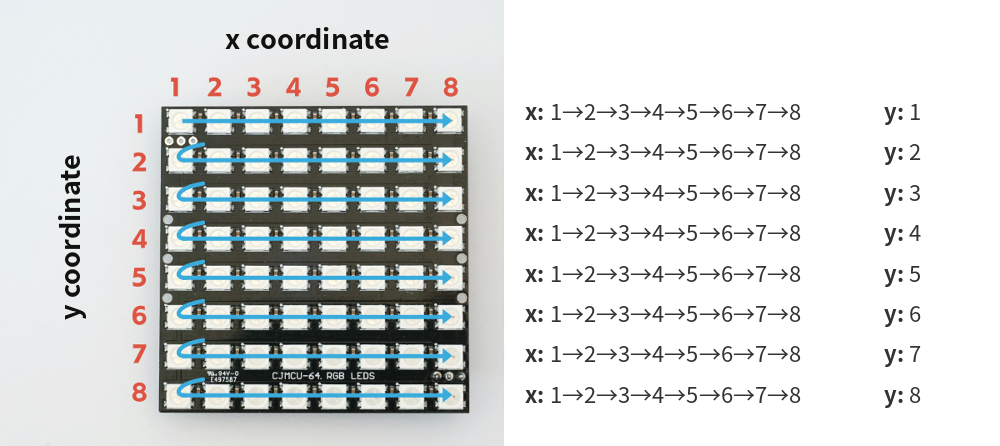
Let's upgrade the program you just made that lights up the top row from left to right. Add a new variable "Y" and build the program as in the next picture. Put another [repeat (8) times] block inside the [repeat (8) times] block.
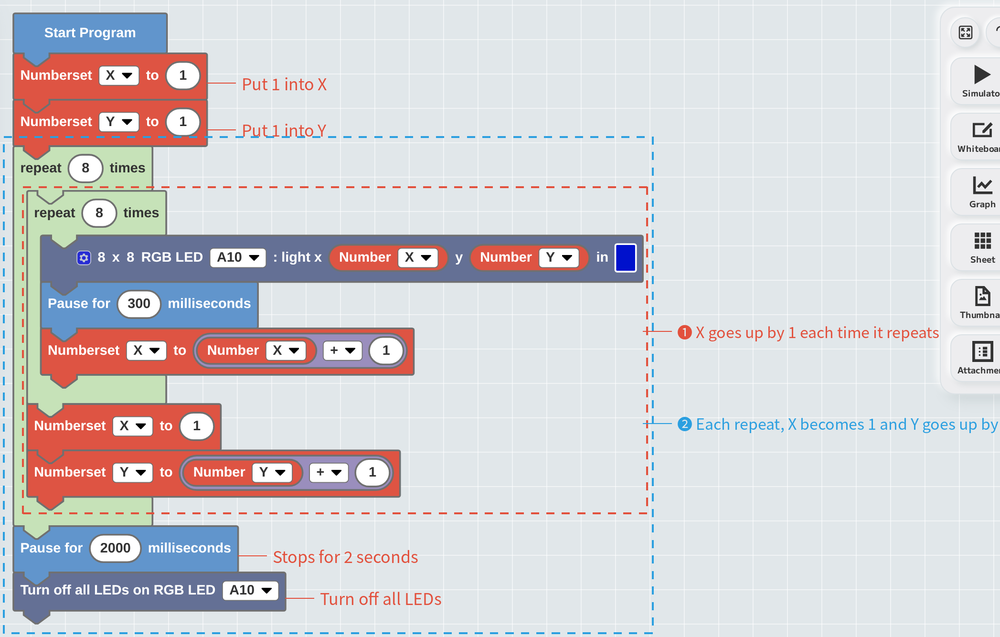
<How the Program Works>
❶ This part lights up 8 LEDs in a row, one by one. The x coordinate is the variable "X," and the y coordinate is the new variable "Y." Each time it repeats, "X" goes up by 1.
❷ This part moves the next LED to the left end of the row below. Each time it repeats, "X" is reset to 1 and "Y" goes up by 1.
Run the program. The LEDs light up starting from the top left. When all 8 in a row are lit up to the right end, the next row lights up from its left end. It finishes at the right end of row 8.
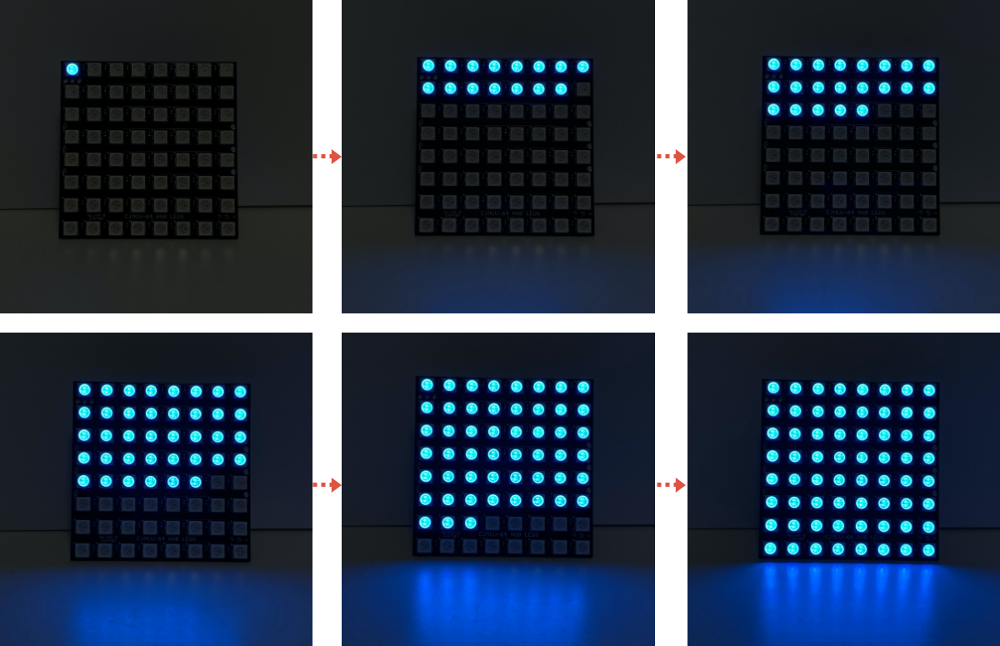
Watch it in the video.
