

[No.13] Make a Glowing Beach Ball!
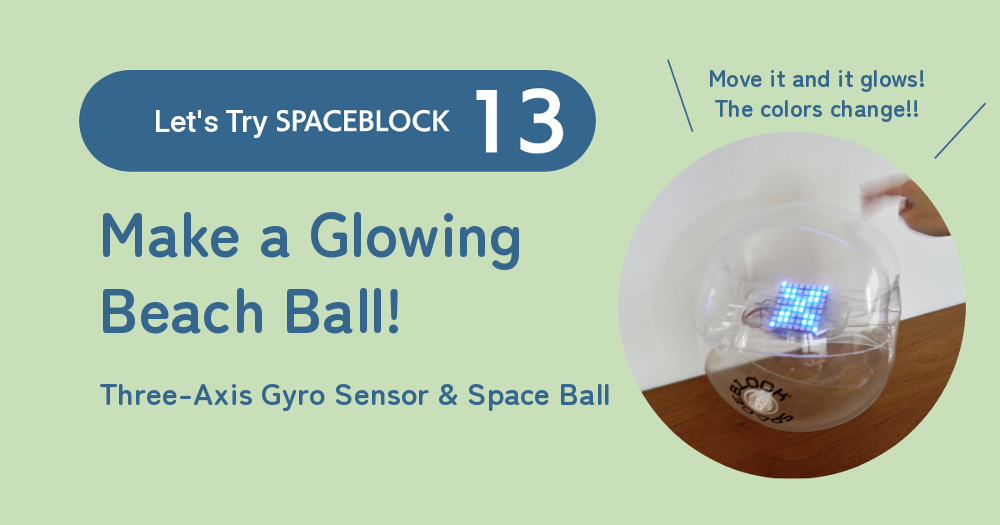
In the last lesson, you used the angle values from the "three-axis gyro and three-axis acceleration sensor module." This time, you'll use its acceleration values to make a mysterious glowing beach ball. You'll use a fun expansion part called the "Space Ball"! The Space Ball is a special beach ball that can hold a SPACEBLOCK inside.
What You Need & Getting Ready
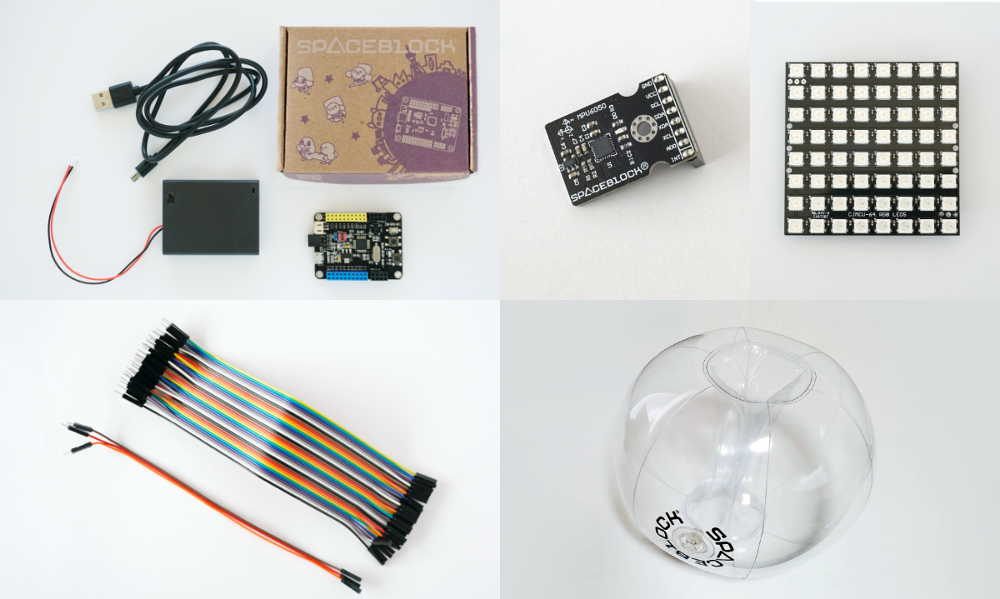
- SPACEBLOCK Standard Package [SPACEBLOCK board, USB cable, battery box]
- Three-axis gyro and three-axis acceleration sensor module (three-axis gyro sensor)
- 8×8 RGB LED matrix panel (LED panel)
- Space Ball
- Jumper wires [3 pin header–pin socket wires]
- A computer for programming
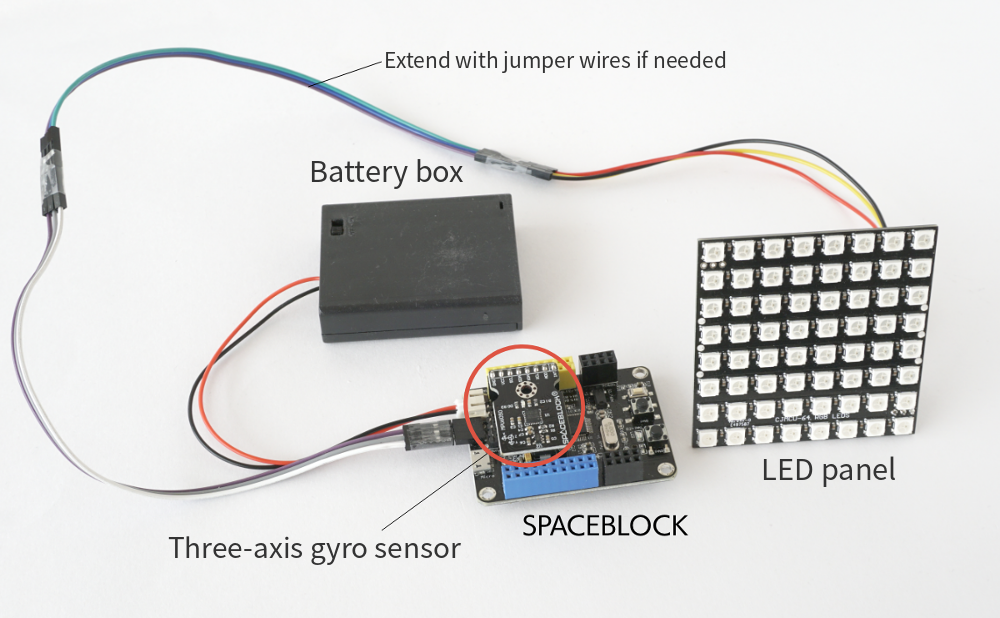
Connect the Expansion Parts to SPACEBLOCK
What Is Acceleration on the Three-Axis Gyro Sensor?
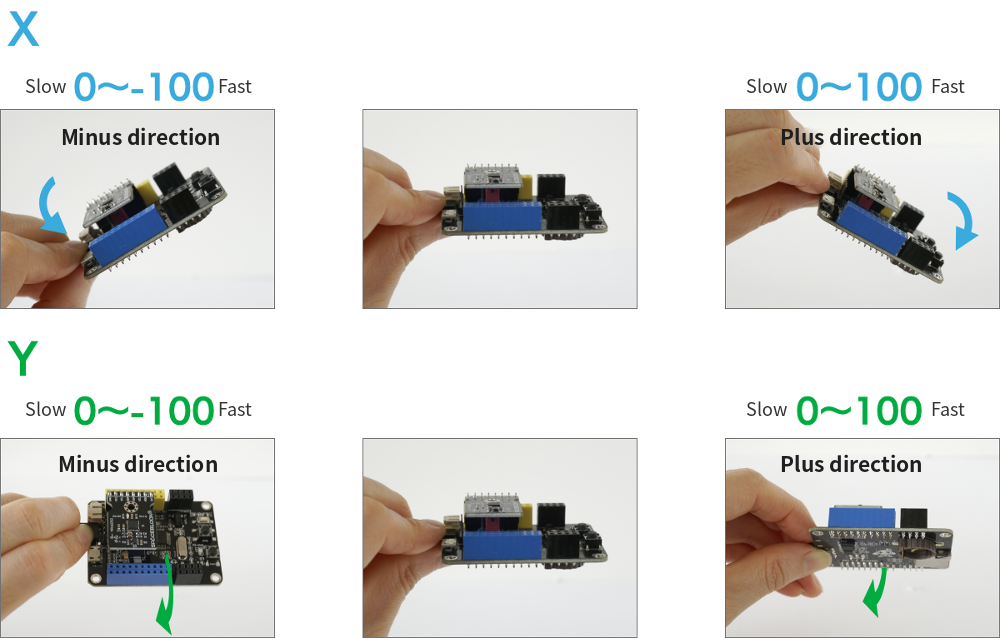
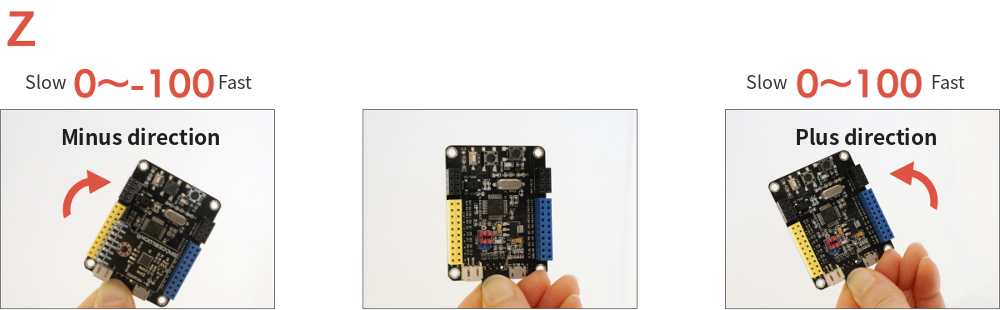
The three axes of acceleration
Acceleration tells you how fast something is moving. The three-axis gyro has an X-axis, a Y-axis and a Z-axis, and it measures which way the board moved along each axis as acceleration X, acceleration Y and acceleration Z.
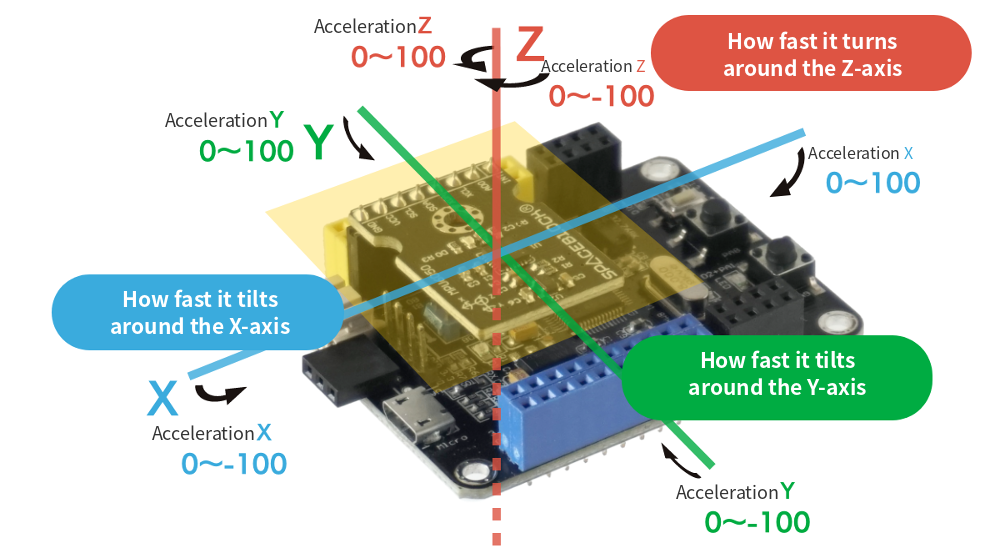
Range of acceleration values
When the movement is slow, the number is close to 0. When it's fast, the number gets close to 100. Each axis has a plus direction and a minus direction.
Check the Acceleration Values
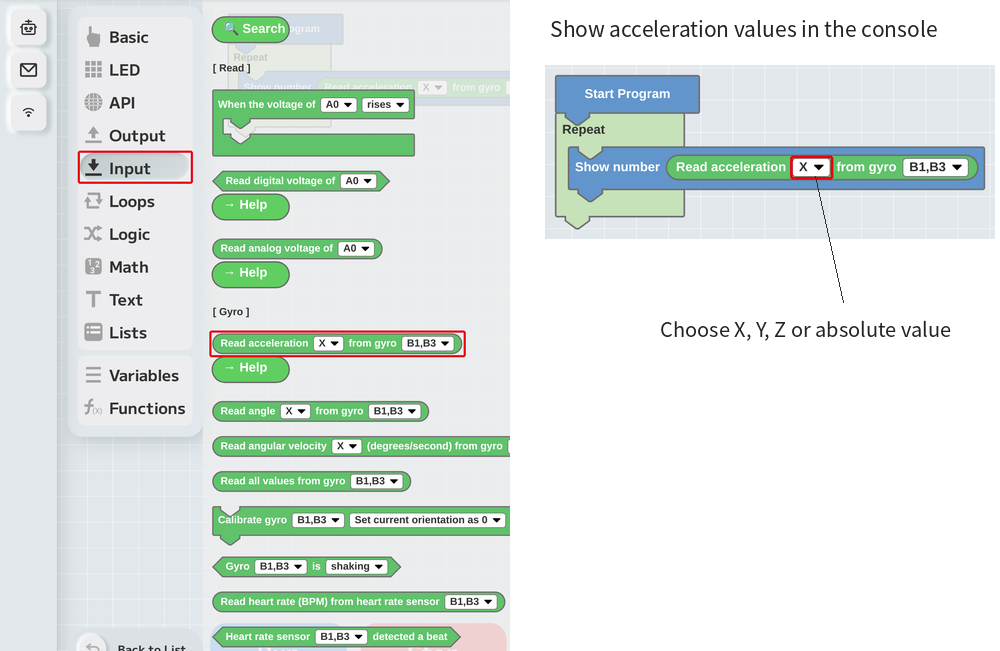
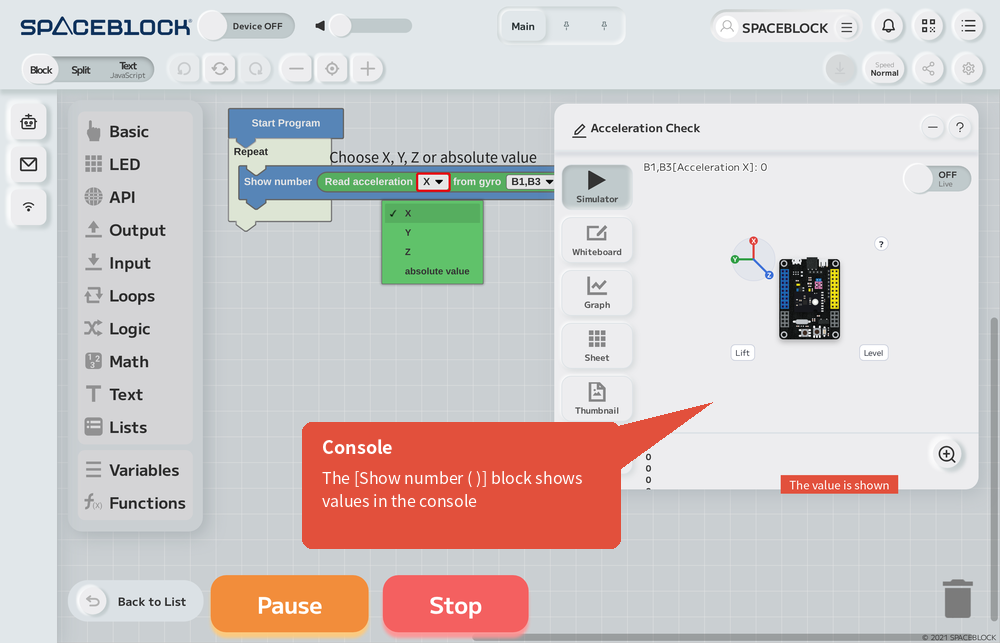
Let's actually check the acceleration values in the console.
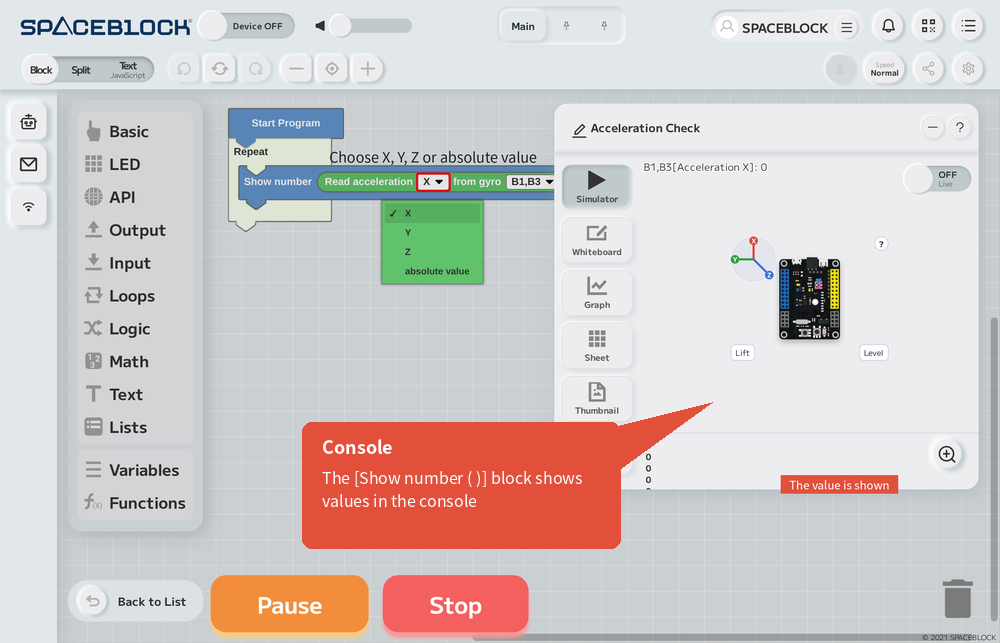
Run the program and move the SPACEBLOCK with the three-axis gyro sensor attached. You'll see the values change depending on the direction and speed of the movement. Check how each of "X," "Y," "Z" and "absolute value" relates to the movement. Note that "absolute value" uses the highest of the absolute values of the X, Y and Z acceleration.
Change the LED Panel Display with Acceleration!
Now it's finally time to make the glowing ball. Blowing up the Space Ball is the fun part saved for last. First, let's program the SPACEBLOCK. The ball keeps moving in all directions, so we'll make the way it lights up change with the speed of the movement, no matter which way it moves. Let's build the program using the "absolute value" of the acceleration.
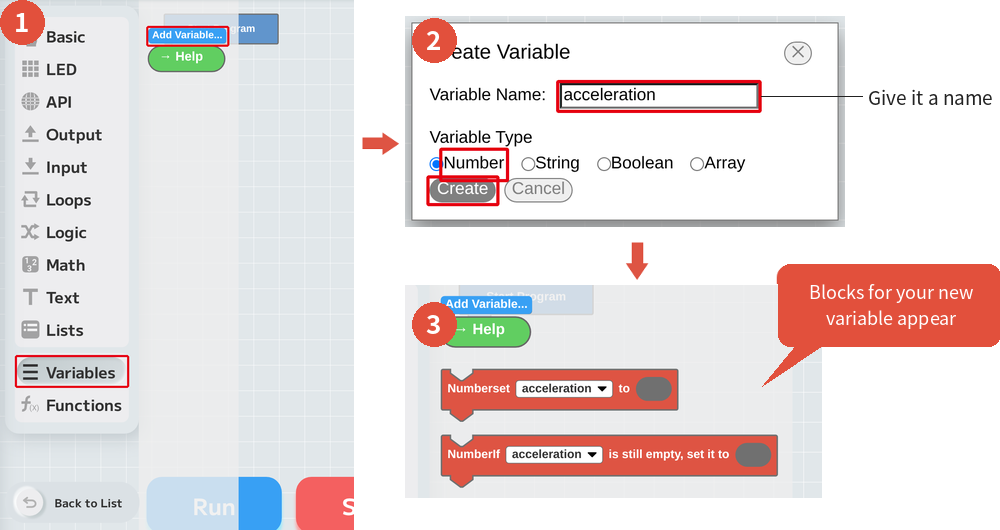
Create a variable
Create a new variable and name it "acceleration."
Combine the [Repeat] block and the [Number set (variable name) to ( )] block, and set the gyro's acceleration "absolute value" into the variable "acceleration."
Split the program by conditions
Next, make the program that switches the LED display. Use the [if ( ) then … else …] block and the [(0) (=) (0)] block to show the LED panel in 4 different ways depending on the acceleration value.
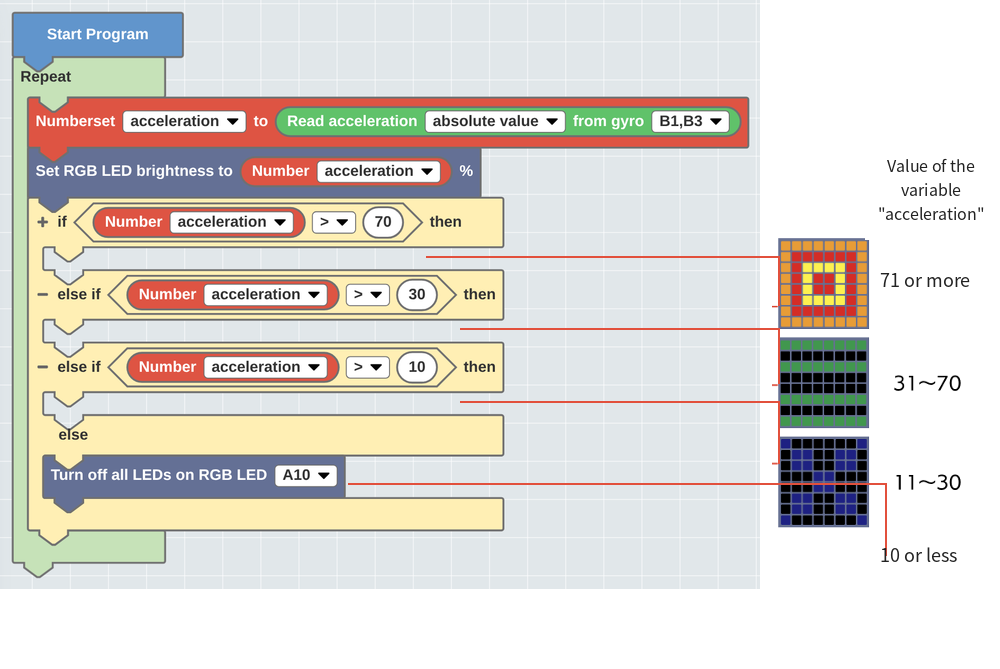
Choose what the LED panel shows
Put LED panel blocks inside the [if ( ) then … else …] block, and the program is finished as shown in the next picture.
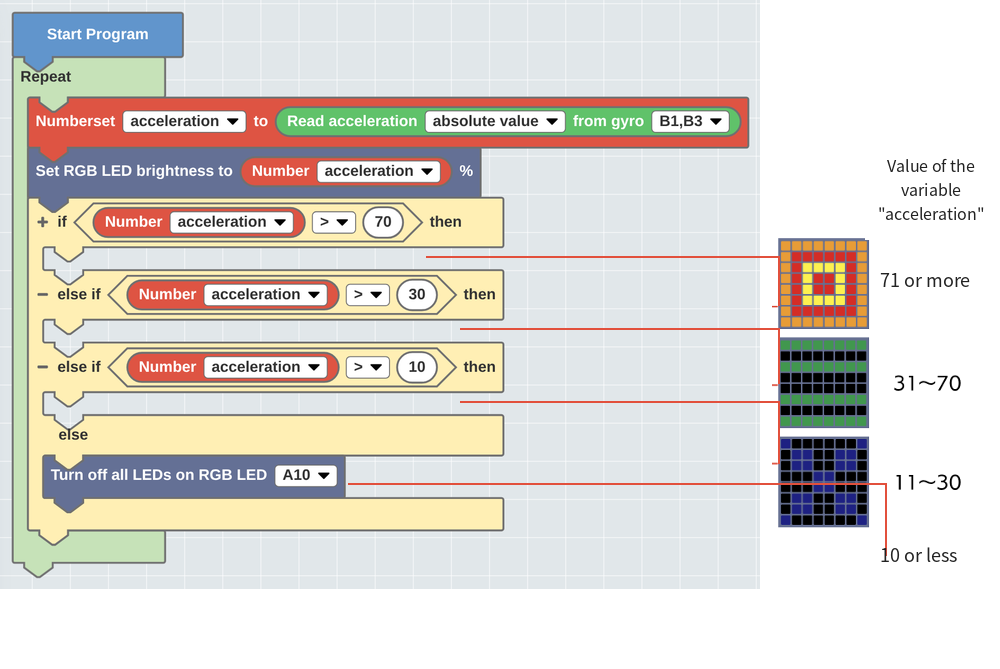
The program is done
That's it for the program. The LED display changes like this depending on how fast you move it.
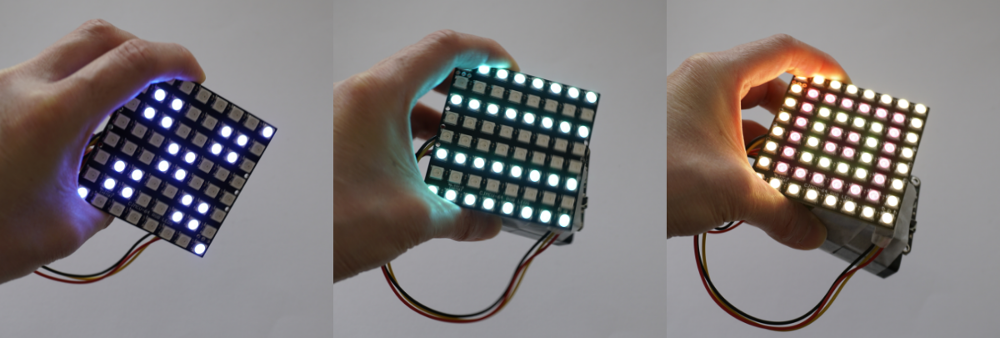
Let's watch a video of the program running.
Put It in the Space Ball!
Now it's finally time to use the Space Ball! Blow some air into the Space Ball, and once it's partly inflated, put the SPACEBLOCK into the tube-shaped space in the middle, then blow it up all the way.
Before putting it in the Space Ball, stack the SPACEBLOCK, battery box and LED panel and tape them together so they stay in one piece. To keep sharp corners from making holes in the ball, it's a good idea to wrap everything in bubble wrap. Don't forget to turn the battery box switch ON first!
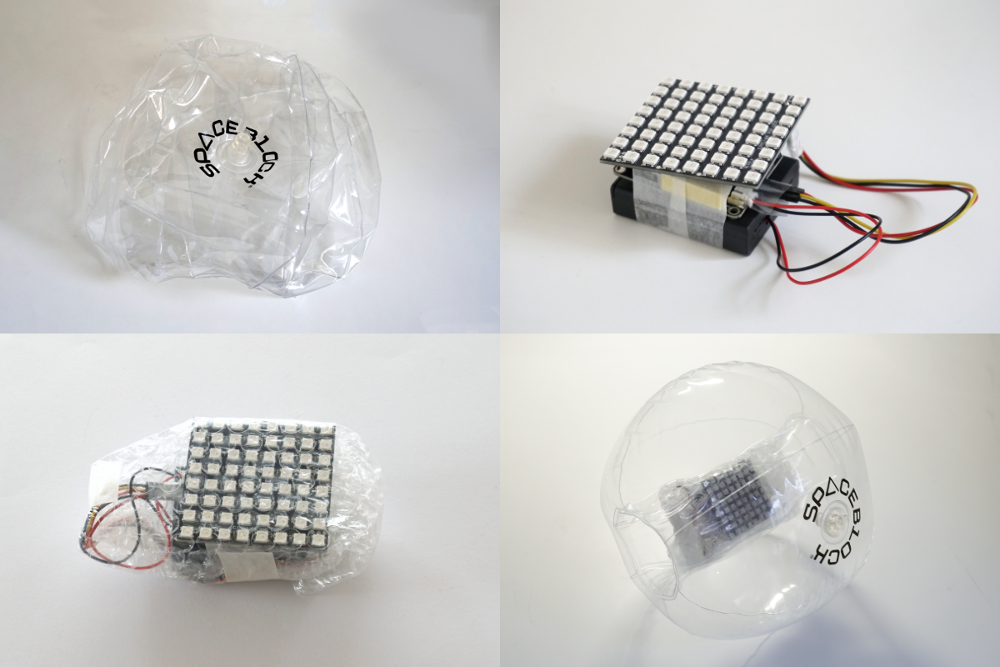
The air pressure holds the SPACEBLOCK in place.
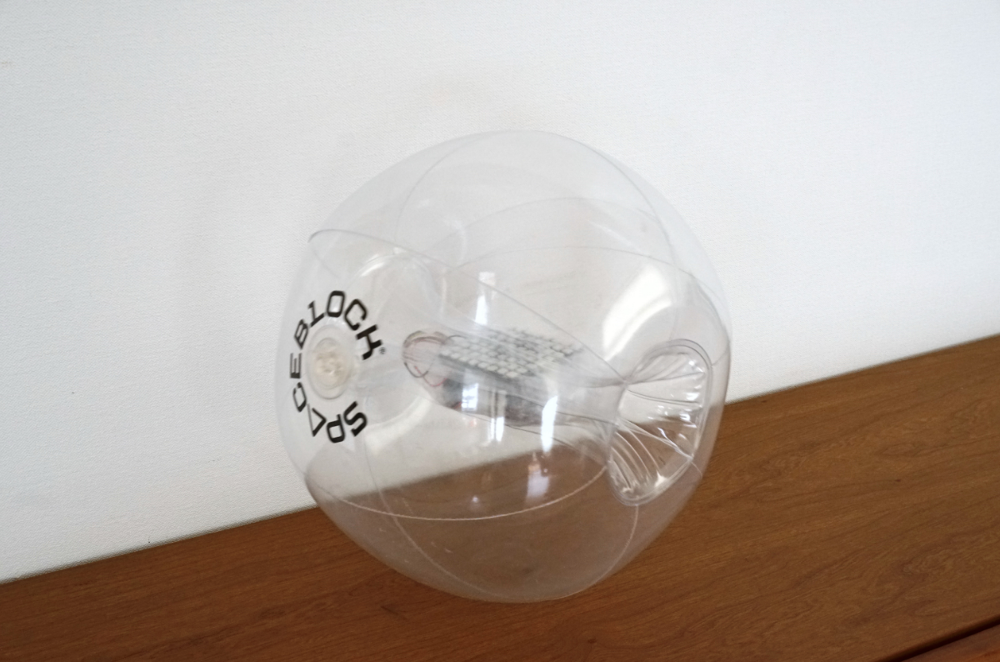
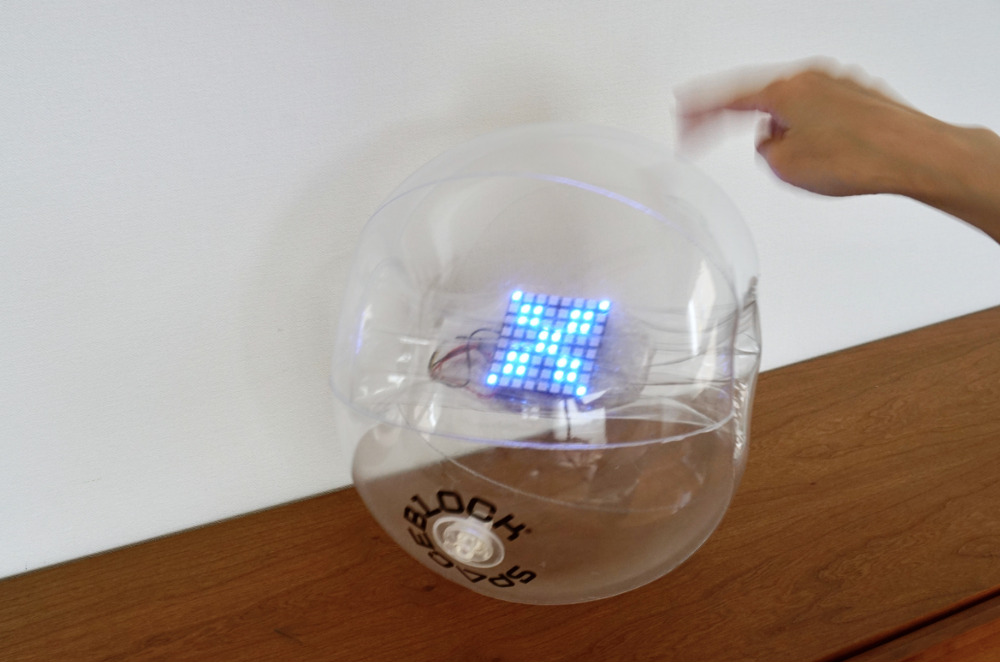
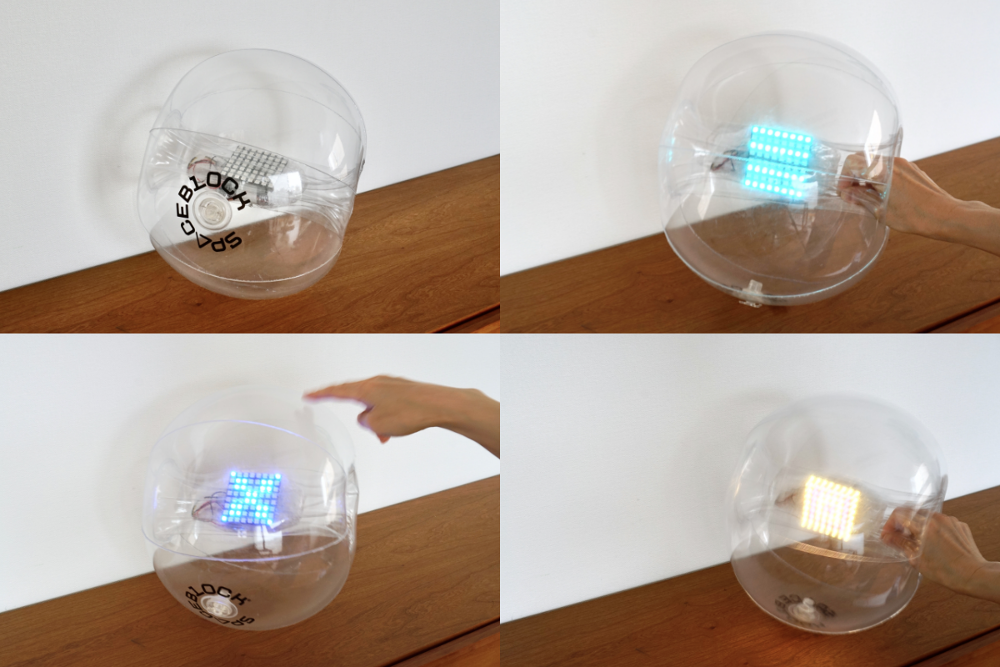
Let's watch the video.
Like in this example, you can just enjoy making it glow, or you could carry it very carefully and play a game where you lose if it lights up. You can change how much movement makes it glow as much as you like by adjusting the program. Think up lots of different ways to play!
Finally, here's a video from the official SPACEBLOCK page.
A workshop where you make glowing balls like this looks like so much fun!!
