How to Use SPACEBLOCK Microcontroller Board
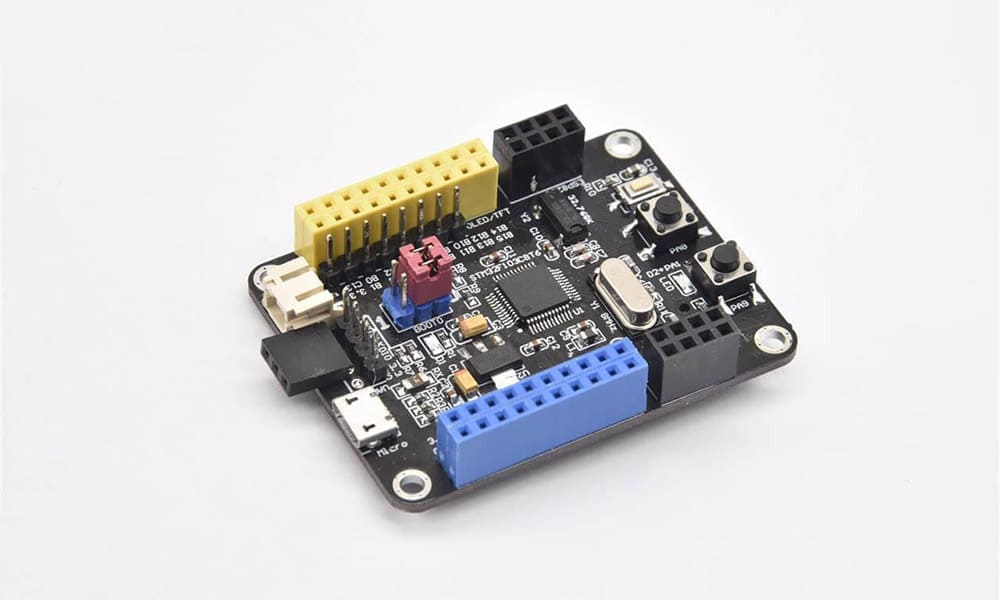
This is a microcontroller board specifically designed for SPACEBLOCK.
After logging into the SPACEBLOCK official website, you can connect the SPACEBLOCK dedicated microcontroller board to your computer, tablet, or smartphone via USB, allowing you to control various parts such as microcontroller boards, motors, and sensor modules through programming.
SPACEBLOCK
Microcontroller Board


Blue pin socket
Yellow pin socket
Horizontal pin socket
USB MicroB connector
Battery box connector
Built-in LED
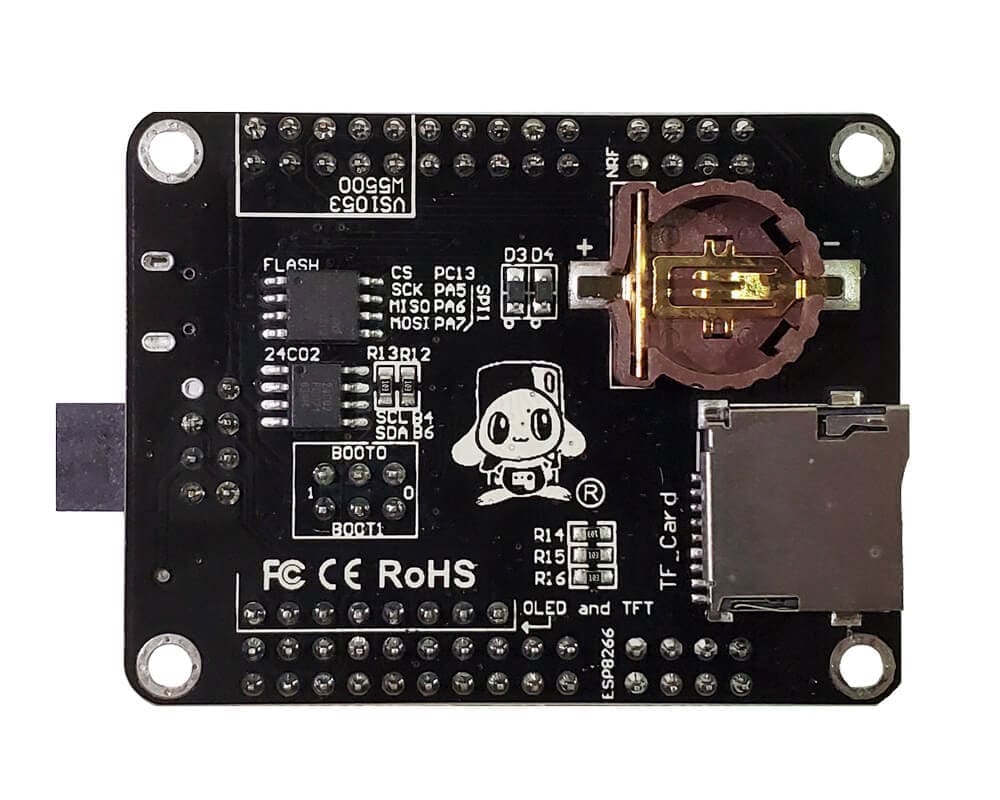
SD card reader
About Types of Pins
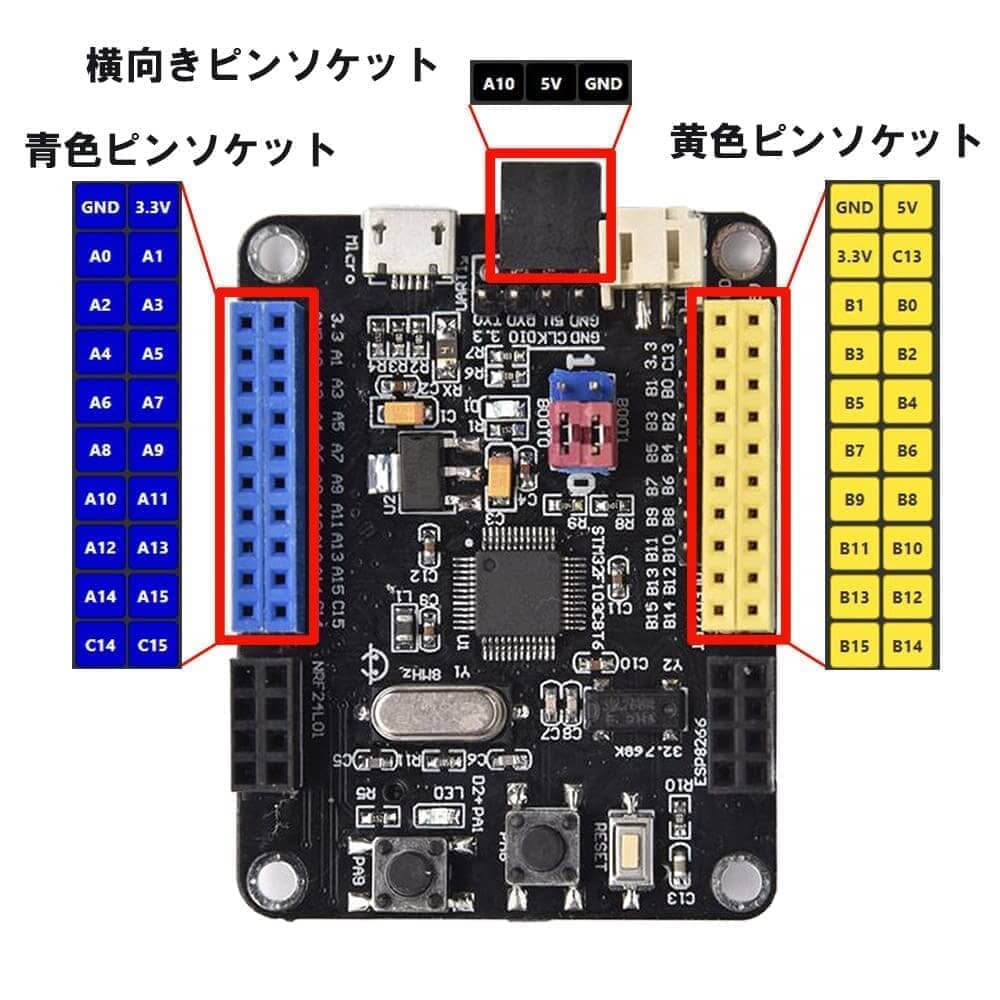
3.3V, 5V
These pins carry electrical current. Pins labeled 3.3V provide a voltage of 3.3V, while those labeled 5V provide 5V.
GND
This pin denotes the ground reference point, similar to the negative pole of a battery.
A0~A15, B0~B15, C14~C15
These pins support digital and analog input/output as well as PWM output.
Digital pins can read voltage received from other digital pins as either High (true) or Low (false), or output voltage as 0V or the reference voltage.
Analog pins can read voltage received from other analog pins as a value between 0 and 1023 (0 to 3.3V).
PWM pins can output PWM signals, allowing control of motors or generating sound from speakers.
Available pins may vary depending on the parts or blocks used. Please refer to the instructions for each part or block for more details.
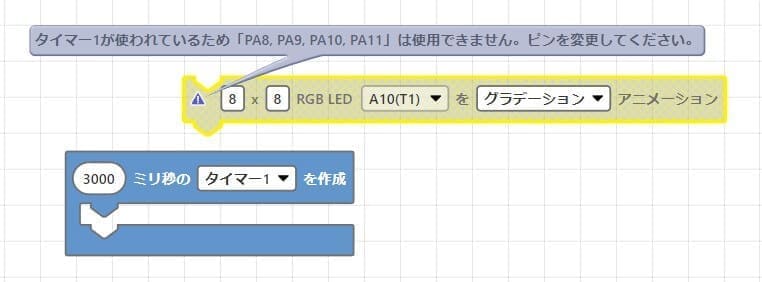
Regarding T1, T2, T3, T4 Notation
T stands for Timer. A10 corresponds to T1 (Timer 1), A0 to T2 (Timer 2), B0 to T3 (Timer 3), and B10 to T4 (Timer 4).
If you are using the 'Create Timer' block in the basic category, pins that overlap with the corresponding timer cannot be used. Please select a different pin to use.
Regarding PullUp Notation
Pins A4, A6 to A7 support this notation. These pins are stabilized in a High state by connecting a pull-up resistor to them. This is used when voltage stability cannot be achieved with regular pins, especially with certain sensor modules. Additionally, because voltage is adjusted by the resistor, the values obtained may vary compared to unsupported pins.

About User Buttons (PA8, PA9)
While pressing the user buttons on the SPACEBLOCK microcontroller board, the digital signals of A8 and A9 change. While pressing the PA8 user button, the digital signal of A8 becomes Low (false), and while pressing the PA9 user button, the digital signal of A9 becomes Low (false).
Specifications
| Installed Microcontroller | 32bit STM32F103CBT6 |
|---|---|
| Core Processor | 32bit ARM Cortex-M3 |
| Maximum Operating Frequency | 72MHz |
| RAM | 20KB |
| Flash Memory | 128KB |
| EEPROM | 2KB |
| Buttons | Reset button x1, User button x2 |
| LED | Power LED x1, User LED x1 |
| GPIO | 35 |
| USB Connector | Micro B |
| Card Reader | Compatible with microSD (SD card sold separately) |
| RTC Button Cell Battery Holder | Compatible with CR1220 (battery sold separately) |
| Power Source | USB, Battery Box, or External Supply (3.3V, 5V) |
| Size | 47 x 57 (mm) |
| Package Size | 92 x 120 x 23 (mm) |
※Official Vendor ID has been obtained from the USB Implementers Forum, Inc.
※When connecting USB, turn off the battery box and do not supply power simultaneously from USB and the battery box.
Connection Method
How to Connect your Computer (or Smartphone, Tablet) to the SPACEBLOCK Microcontroller Board
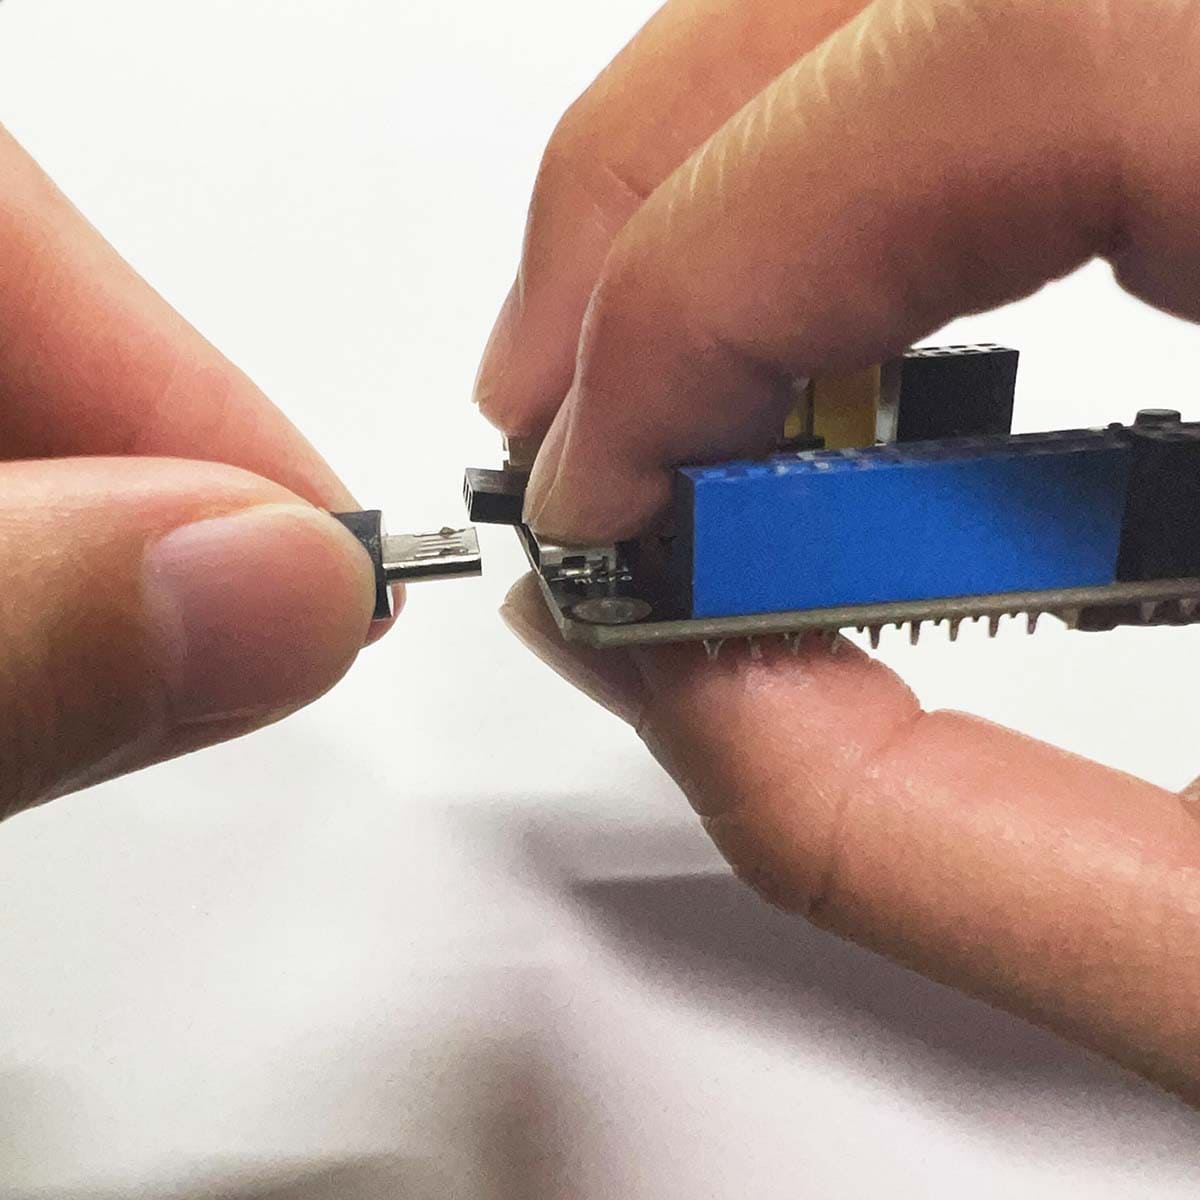
① Use a USB cable (Type A to Micro B) to connect the SPACEBLOCK microcontroller board.
※ When using a smartphone or tablet without a USB Type-A port, you will need to prepare a USB adapter compatible with your device.
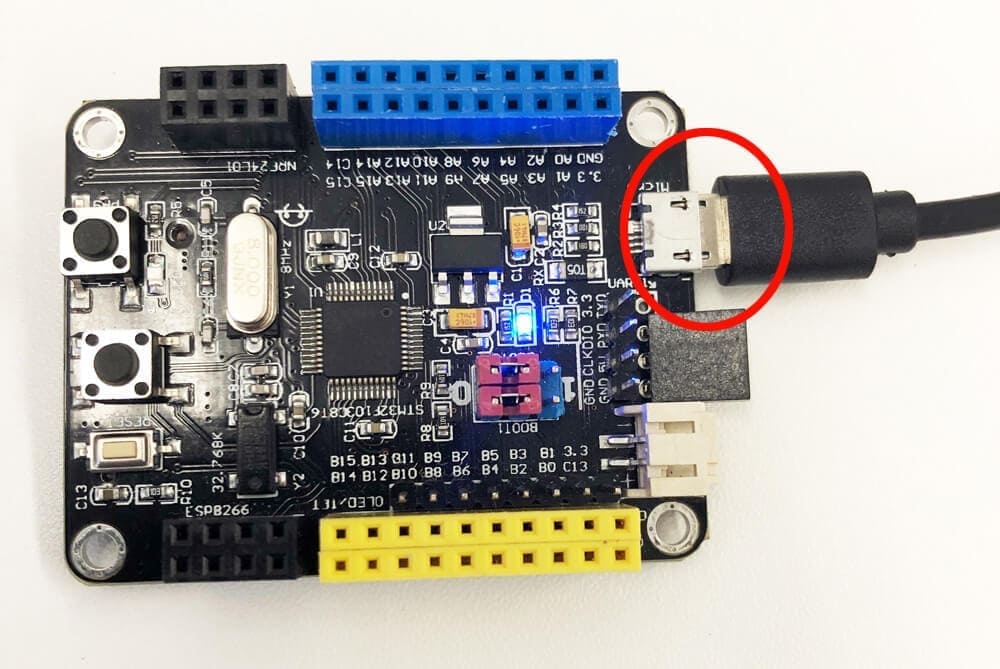
※ When connecting the USB cable to the SPACEBLOCK microcontroller board, make sure to align the connector straight and connect it. Applying excessive force may cause malfunction.
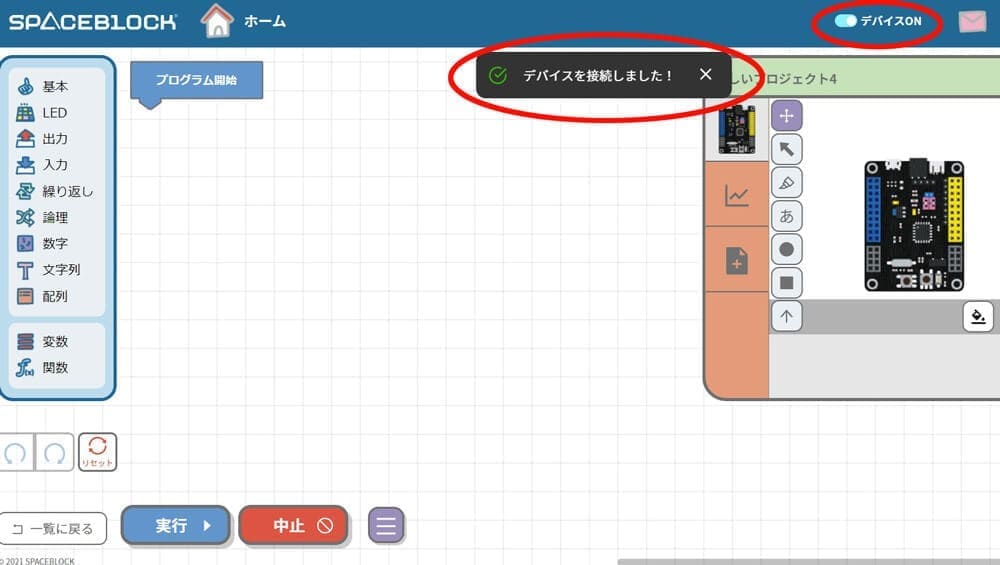
② After logging into the SPACEBLOCK site, open the project screen.
(For first-time users, you can open it by selecting 'My Projects' → 'New Project'.)
If the message 'Device connected!' appears and the device is 'ON', the connection is complete.
③ If you want to reconnect after disconnecting the device, press the 'Device OFF' button at the top right of the project screen. A dialog box like the image below will appear, so press the 'Connect Device' button.
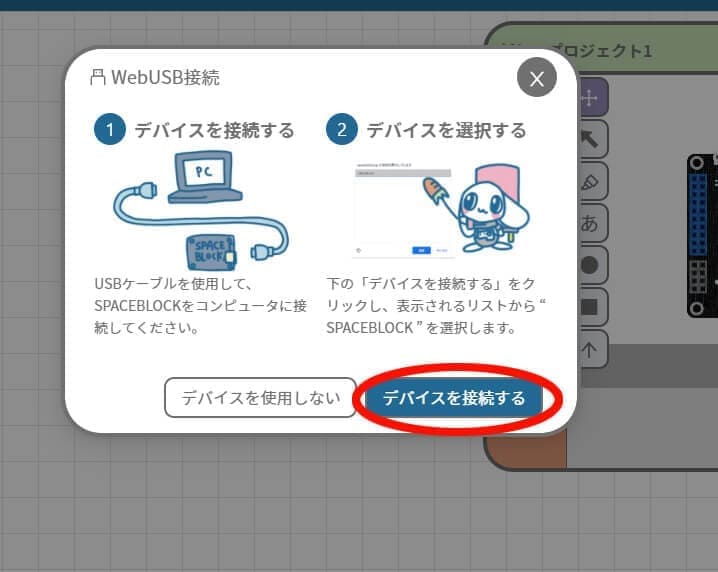
When 'spaceblock.jp is requesting a connection' appears, select 'SPACEBLOCK - Paired' and press the connect button.

How to Disconnect your Computer (or Smartphone, Tablet) from the SPACEBLOCK Microcontroller Board
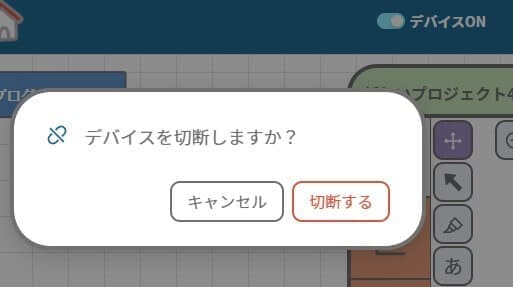
① Press the 'Device ON' button at the top right of the project screen.
② When prompted with 'Do you want to disconnect the device?', press the 'Disconnect' button.
③ You will see a message saying 'Device disconnected'.
The disconnection between the browser and the SPACEBLOCK microcontroller board is complete.
About the Reset Button
Pressing the reset button while connected to the SPACEBLOCK microcontroller board allows you to reconnect immediately.
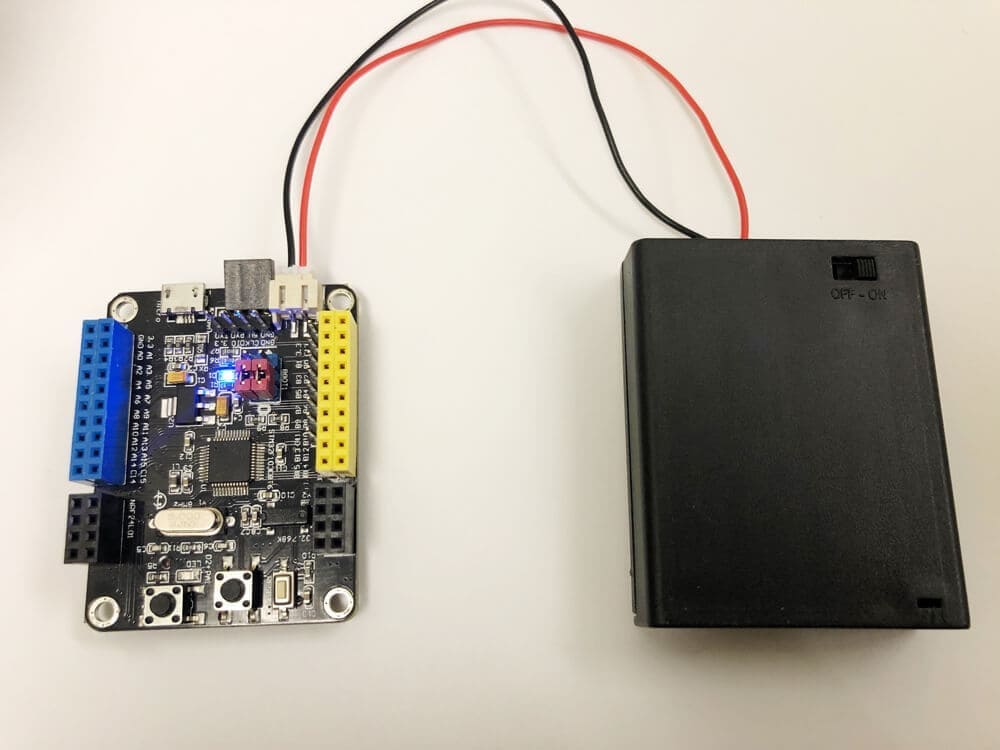
Standalone
Mode
You can write programs to the SPACEBLOCK microcontroller board and operate it independently. Use a battery box.
When using a battery box, make sure to disconnect the USB first, then turn on the battery box. Do not supply power simultaneously from USB and the battery box.
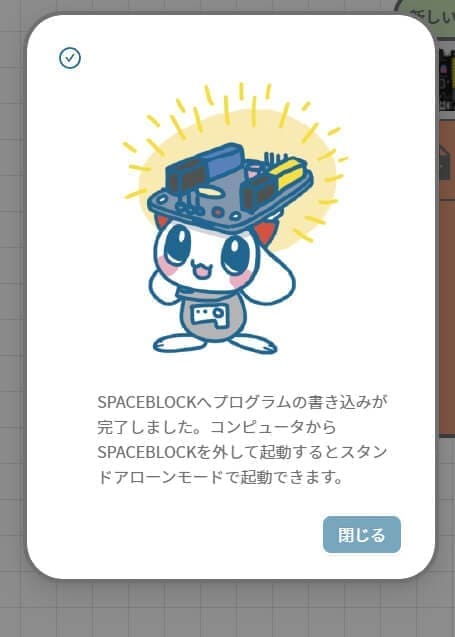
Activate Standalone Mode and Operate the SPACEBLOCK Microcontroller Board Independently
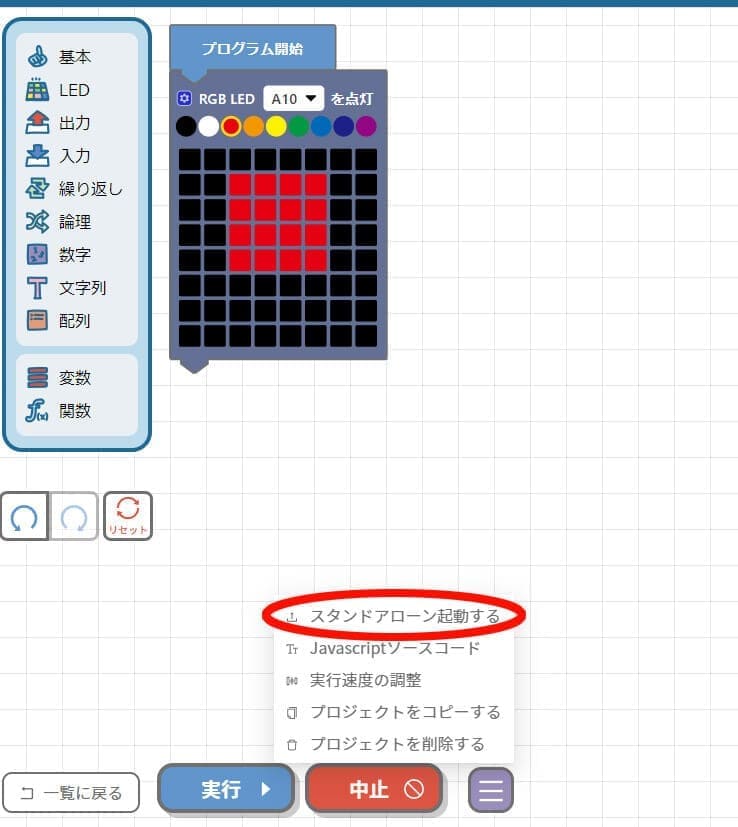
① Go to the screen of the project you want to write and select 'Start Standalone' from the menu at the bottom of the screen.
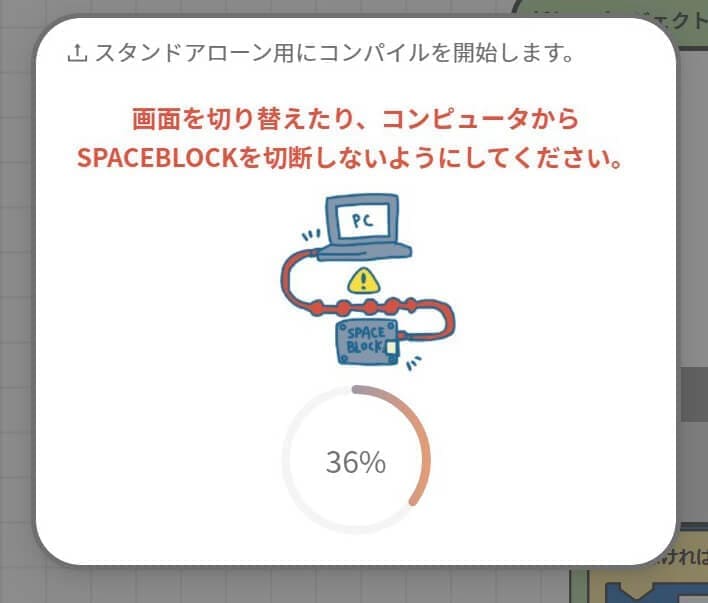
② Press the 'Run' button when the following image appears.

③ The writing screen will appear.
(Please wait without disconnecting the SPACEBLOCK microcontroller board from the USB cable.)
④ Once the writing is complete, disconnect the SPACEBLOCK microcontroller board.

⑤ When you connect the SPACEBLOCK microcontroller board with the included battery box or via USB power supply, the programmed program will run.
Troubleshooting
If SPACEBLOCK isn't working or you encounter any issues, try the following steps:
Some Blocks (Programs) Not Functioning Properly
If the SPACEBLOCK microcontroller board is not functioning properly due to multiple modules connected to the same pin or if the firmware version is outdated, try updating it. (If there is a new version, update instructions will be displayed during connection.)
SPACEBLOCK Not Responding While Running the Program
If the connected SPACEBLOCK microcontroller board does not respond while running the program, it may be frozen. Disconnect the USB cable and reconnect it. If powered by a battery box, turn off the power or remove it once, then reconnect it along with the USB cable.
Unable to Connect to SPACEBLOCK or No Response Even After Connection
If you cannot connect to the SPACEBLOCK microcontroller board or if there is no response even after connection, resetting the SPACEBLOCK microcontroller board may help. Follow these steps to initialize the SPACEBLOCK microcontroller board:
① Connect the SPACEBLOCK microcontroller board via USB cable.
② Press the reset button on the microcontroller board.

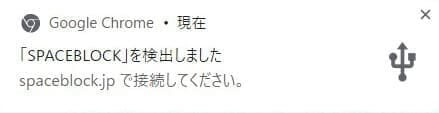
③ The built-in LED will light up in red, then press and hold the PA8 button during this time. (Depending on your browser, a message like 'SPACEBLOCK detected' may appear.)
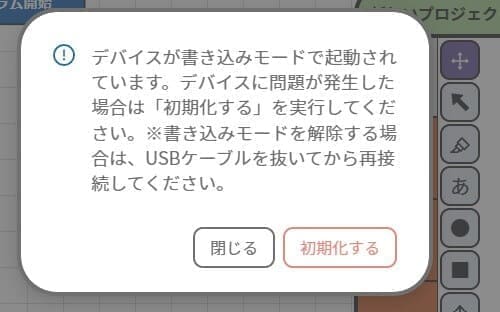
④ Press the 'Device OFF' button on the project screen to reconnect. (If it reconnects automatically, press 'Device ON' to disconnect once.)
⑤ When 'Device is booting in write mode~' is displayed, press the 'Initialize' button.
⑥ Once the writing is complete, initialization is complete.