

[No.11] A Party Light That Moves with the Music!!
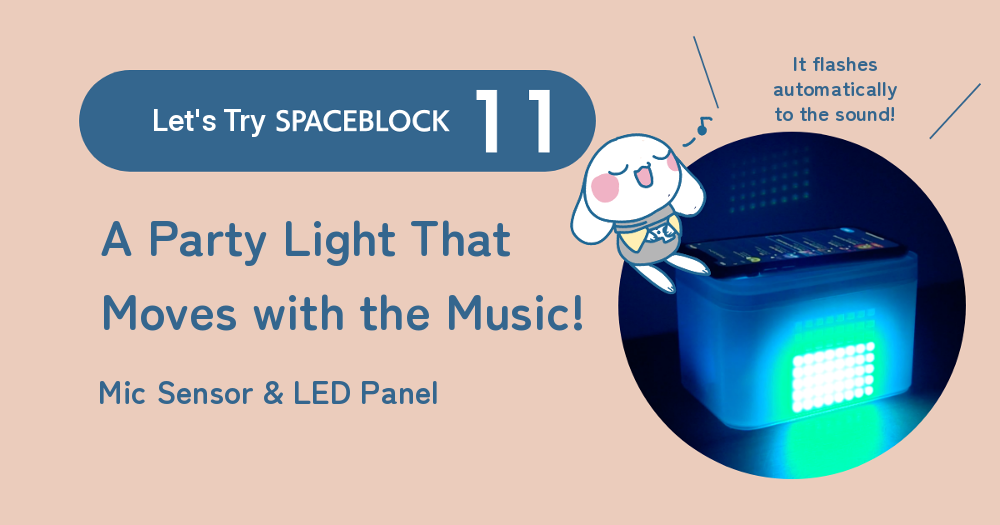
When you have a party at home, playing music sets the mood. But if you want to liven things up even more... how about some light effects? Still, buying a party light you'd only use once in a while doesn't sound great. That's exactly when you should invent one with SPACEBLOCK!
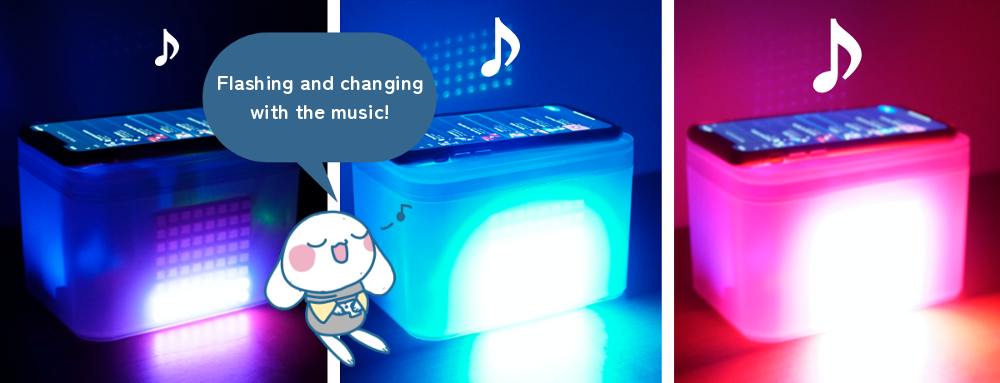
For this invention, we'll use the "Microphone Sensor Module" and the "8×8 RGB LED Matrix Panel." Let's make a party light whose effects change automatically with the music!
What You Need & Getting Ready
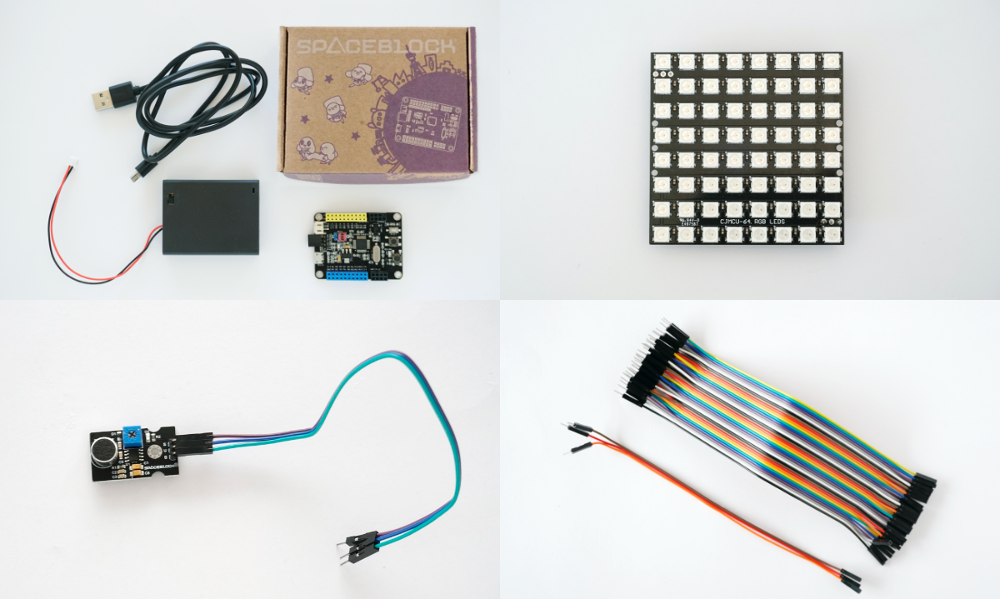
- SPACEBLOCK Standard Package [SPACEBLOCK, USB cable, battery box]
- 8×8 RGB LED Matrix Panel (LED panel)
- Jumper wires [3 wires, pin header to pin socket]
- Microphone Sensor Module (mic sensor)
- A computer for programming
Connect the Add-On Parts to SPACEBLOCK
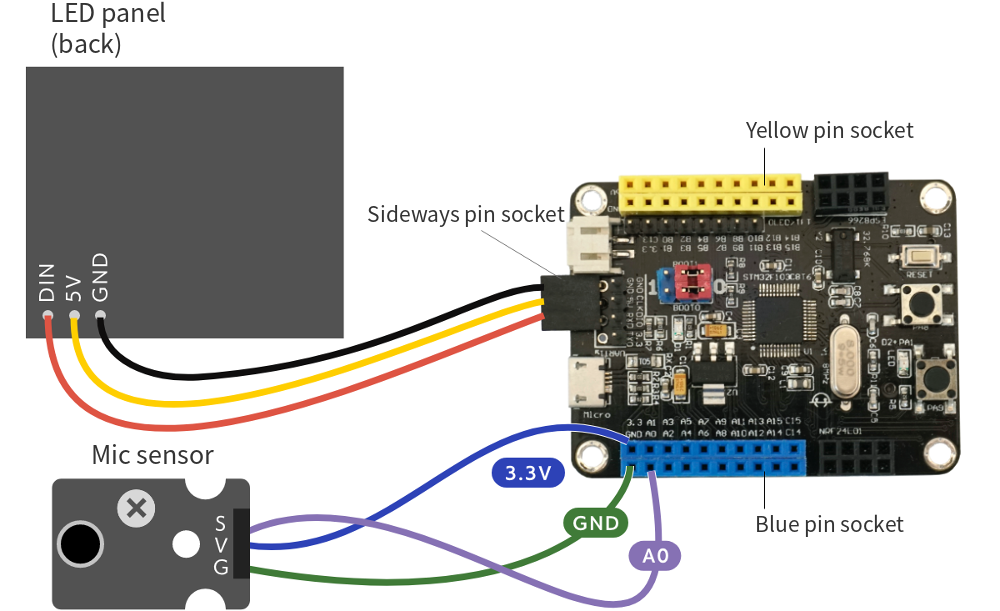
First, let's connect the LED panel and the mic sensor we're using this time to SPACEBLOCK.
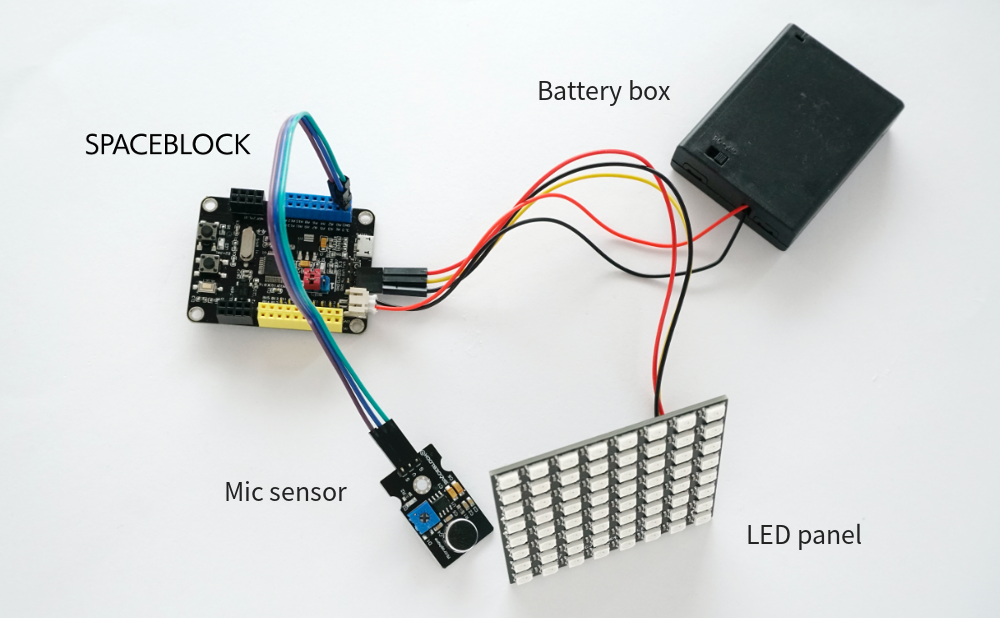
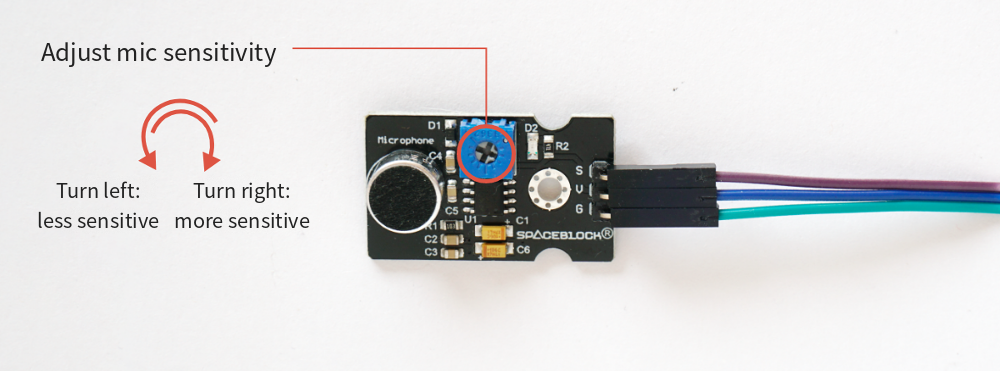
For the details, look at the next picture. Check carefully where to plug in the 3 jumper wires coming from the mic sensor's "G," "V," and "S."
What Can the Mic Sensor Do?
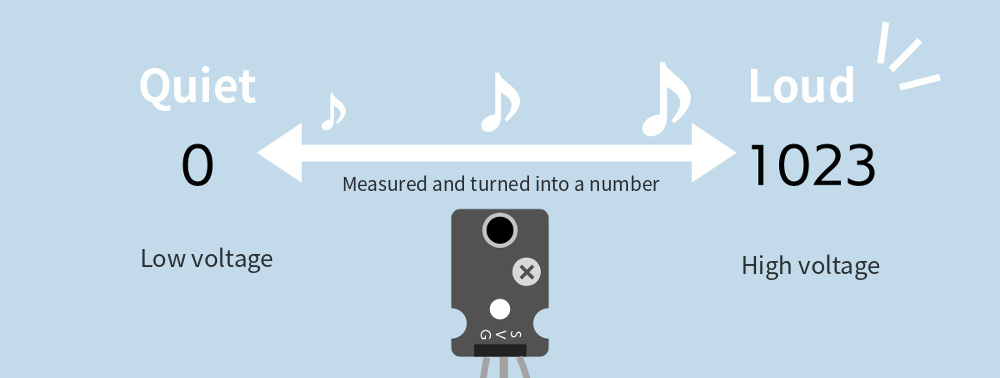
The mic sensor can measure how loud a sound is. Silence is 0, and the louder the sound, the bigger the number. Measuring how much of something there is, like loudness, and sending it to the program as a number is called analog input.
The mic sensor raises or lowers the voltage on the pin plugged into SPACEBLOCK depending on how loud the sound is. That voltage is turned into a number from 0 to 1023 and passed to the program.
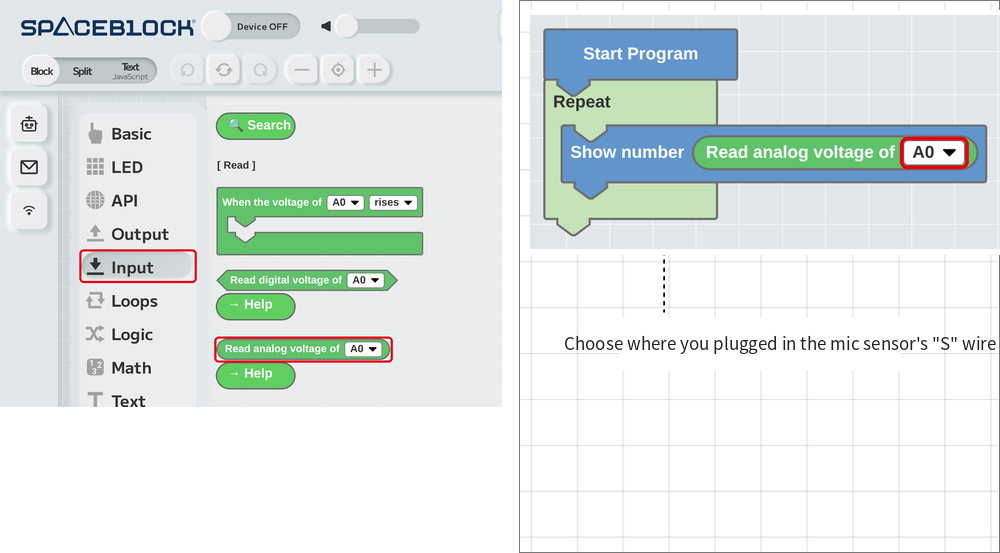
Let's Check the Mic Sensor's Values
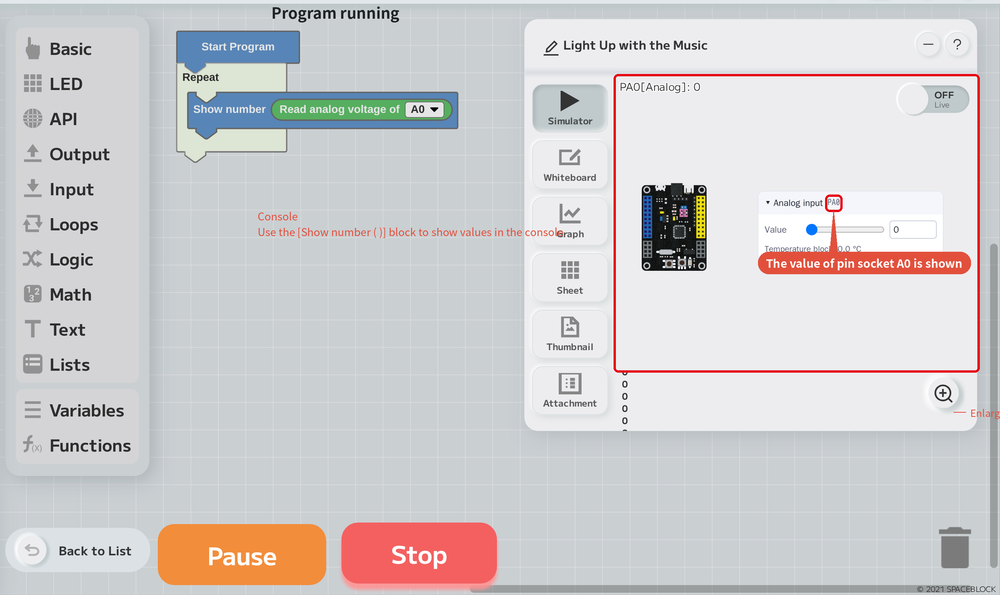
Run the program, and the mic sensor's values appear in the console. You can see how the value changes when it's quiet and when music is playing.
Let's watch it in the video. You can see the value goes up when music plays.
Change the LED Panel's Brightness with the Music!
First, let's make a program that changes the LED panel's brightness with the music. Here's how it works: we use the mic sensor's value to set the LED panel's brightness, so the brightness changes with how loud the sound is.
First, to make the mic sensor's value easier to use in the program, create a "variable." A variable is a container that can hold a value, and you can give it any name you like. Using the next picture as a guide, make a "Number" type variable named "sound."
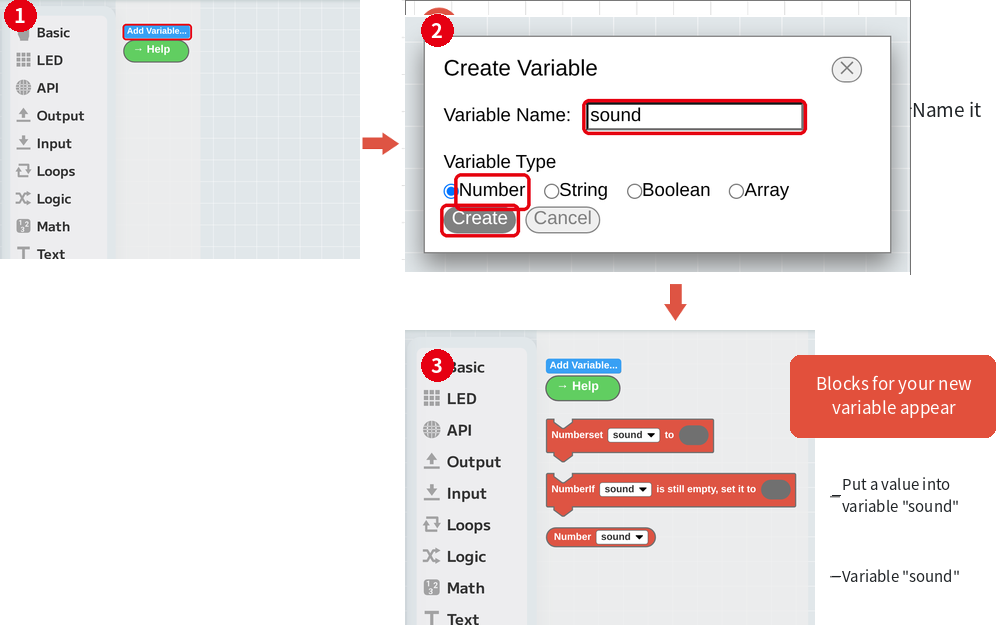
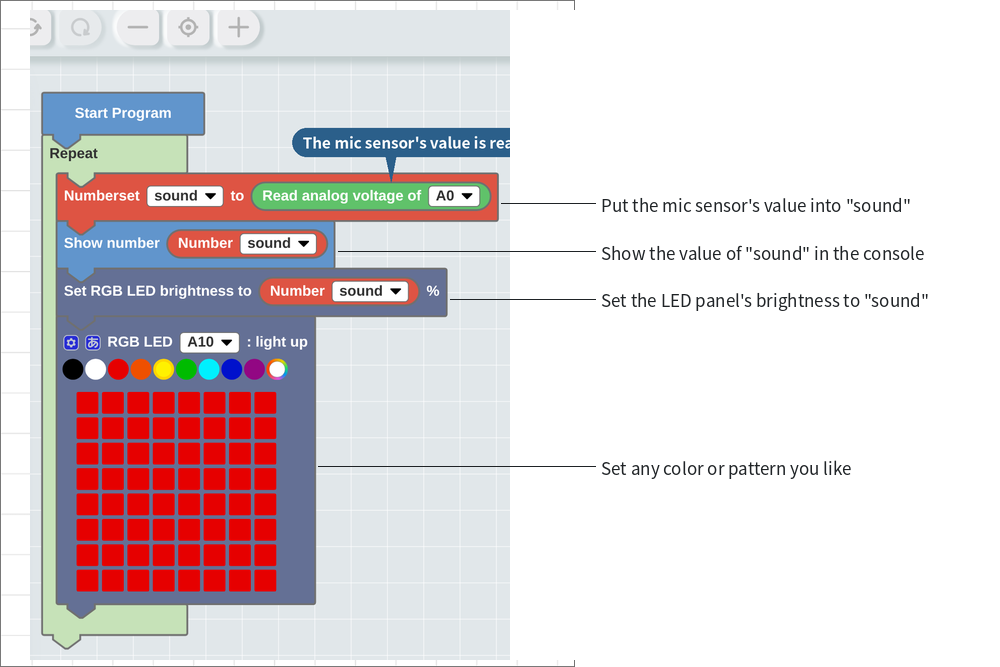
Like the mic sensor's value in this program, when you use the same value two or more times, put it in a variable.
Now the brightness changes with how loud the sound is.
You can set the LED panel's brightness from 0 to 100%. If the mic sensor's values are between 0 and about 100, they're a perfect fit for setting the LED panel's brightness.
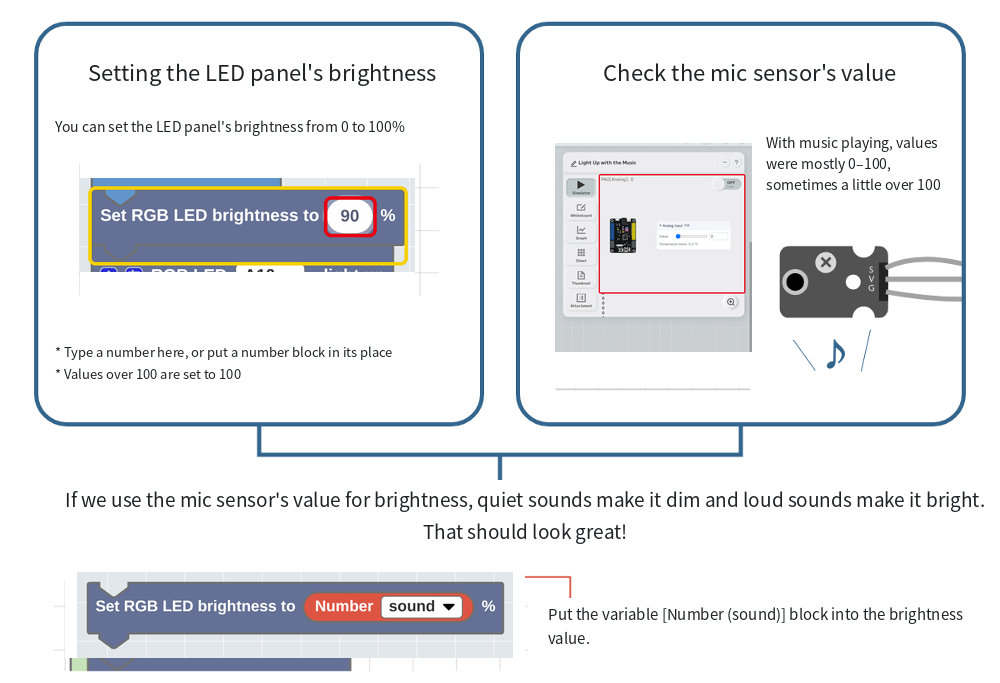
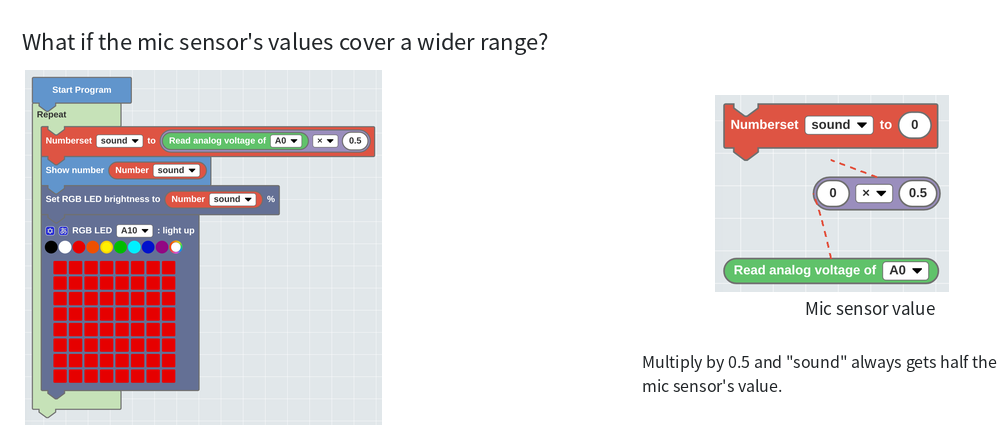
But the mic sensor's values depend on its sensitivity and on how the music is played. If the values cover a wide range and you mostly get values over 100, you can shrink them by a fixed ratio with a calculation to get numbers that work for brightness.
In the next example, when the mic sensor's value is put into "sound," it's multiplied by 0.5, which cuts it in half.
Make the Effects Even Flashier!
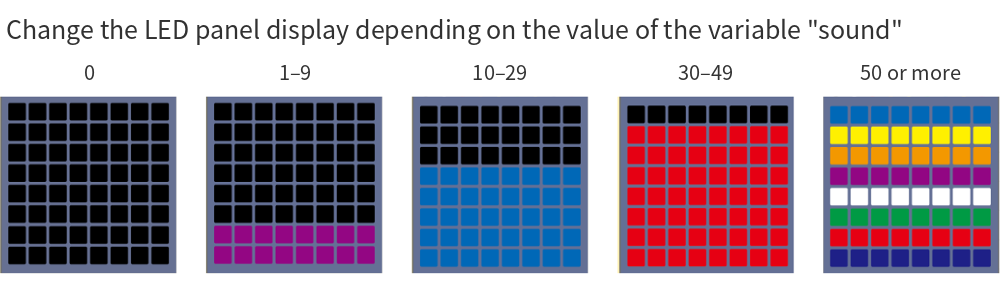
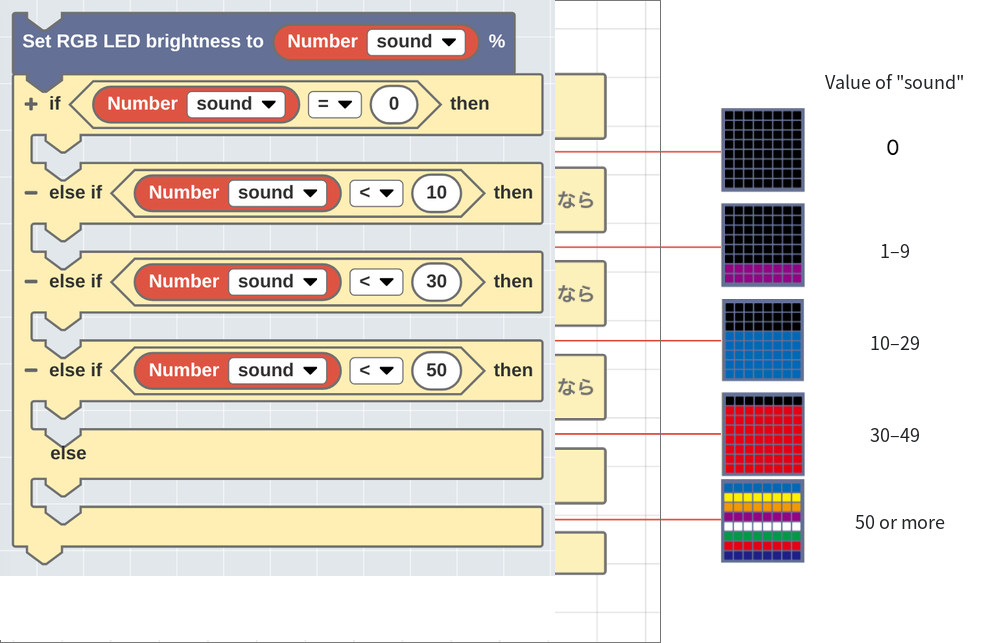
Besides the brightness, let's also change which LEDs light up and what colors they are. Depending on the value of the variable "sound," which holds the mic sensor's value, we'll change what the LED panel shows as in the next picture. It will look like a volume meter going up and down.
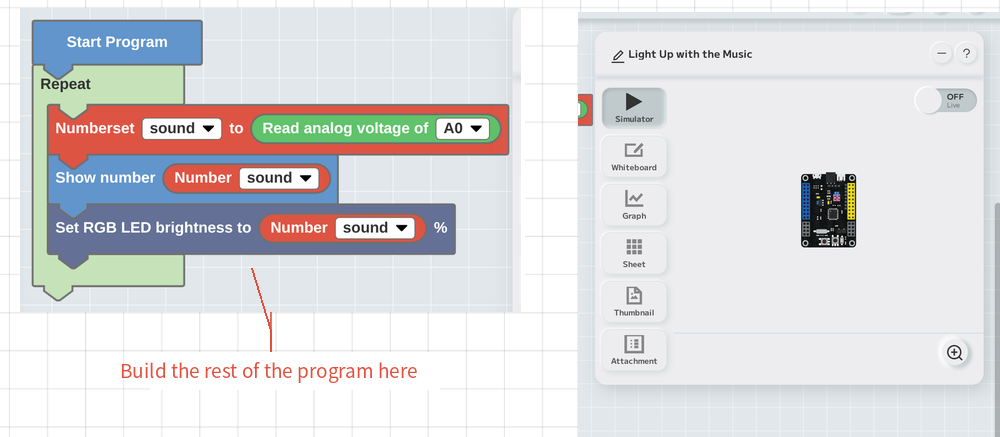
Let's build the program. First, here's the same program as before.
Next, we'll build a program that runs different instructions depending on conditions. Use the [if ( ) then ... else ...] block in the "Logic" category.
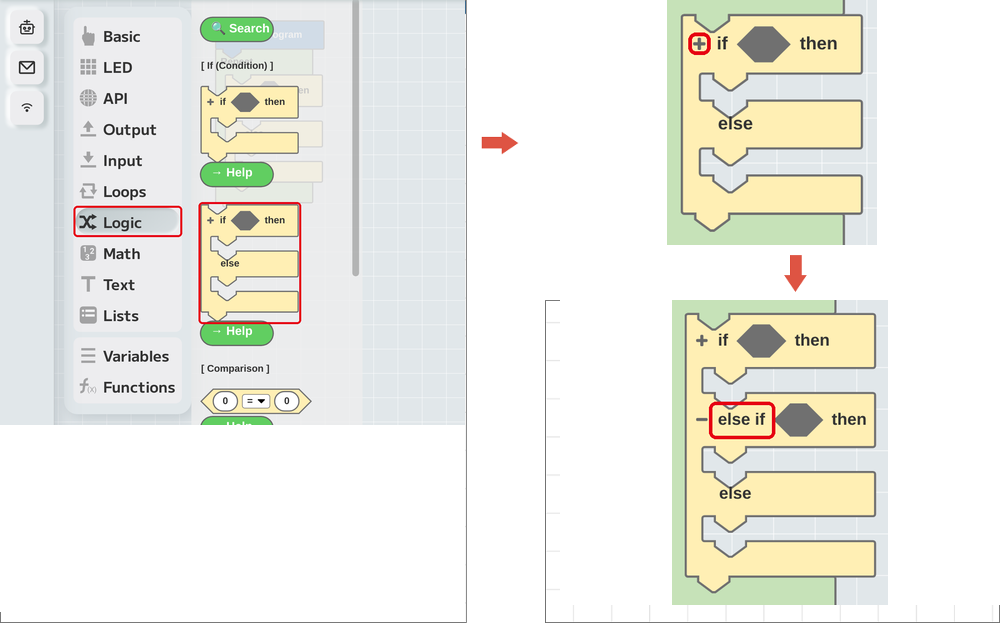
Use the [if ( ) then ... else ...] block to split the instructions into 5 levels. Put the [(0) (=) (0)] block from the "Logic" category into each condition of the [if ( ) then ... else ...] block, and set the expressions and numbers as in the next picture.
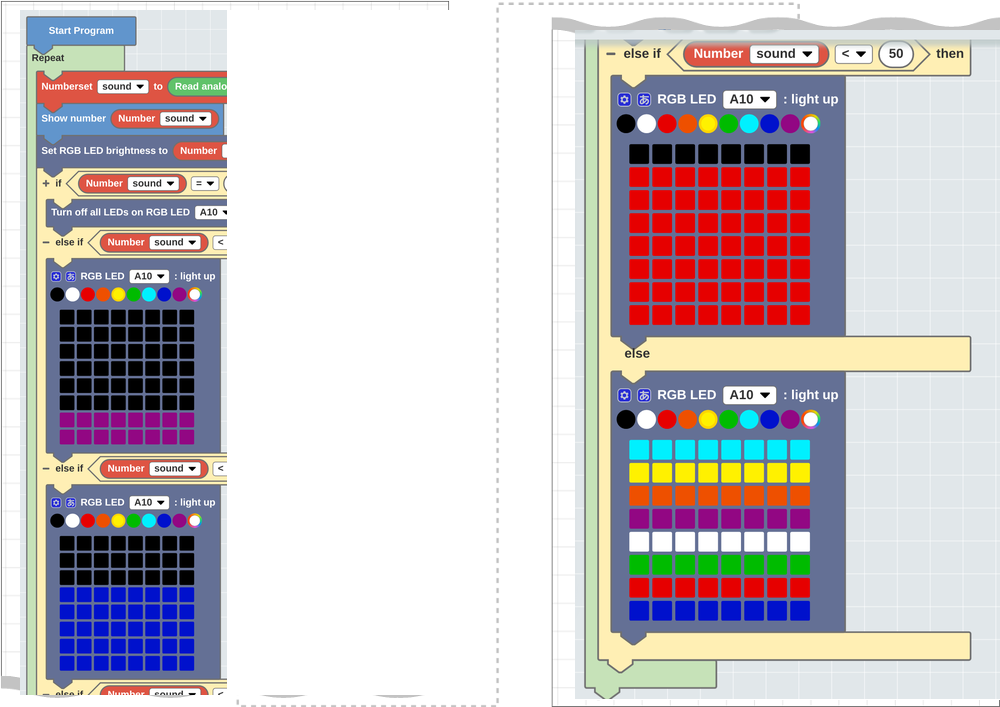
It's finished!
Let's run the program.
Make It Look Like a Real Light
It looks a little plain like this, so let's transfer the program to SPACEBLOCK in standalone mode and put it in a see-through box so it looks like a real light.
Just put it in any box like this!
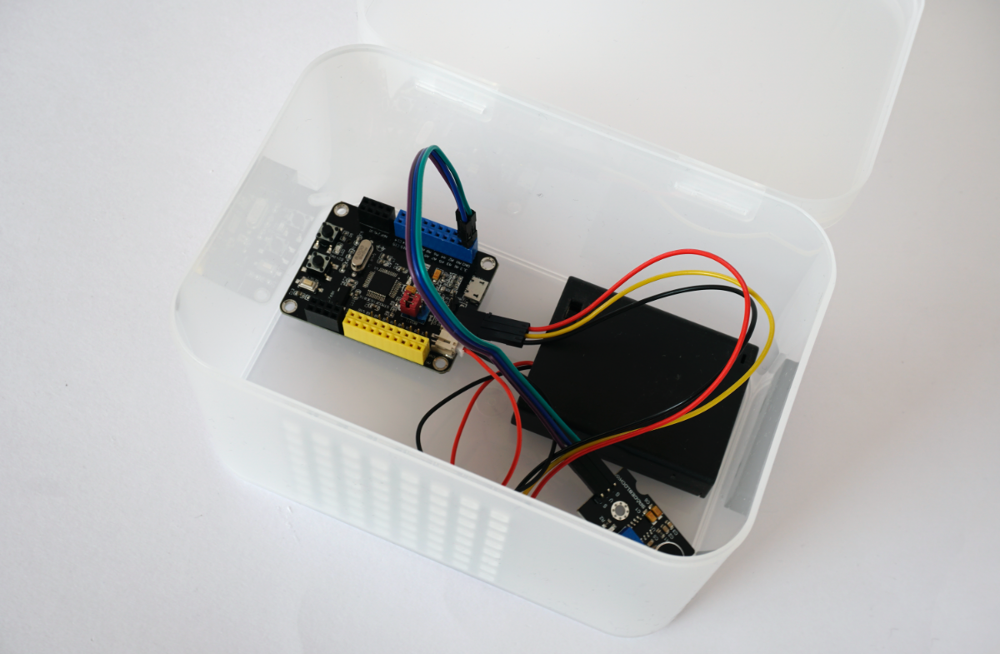
You can set your smartphone right on top.
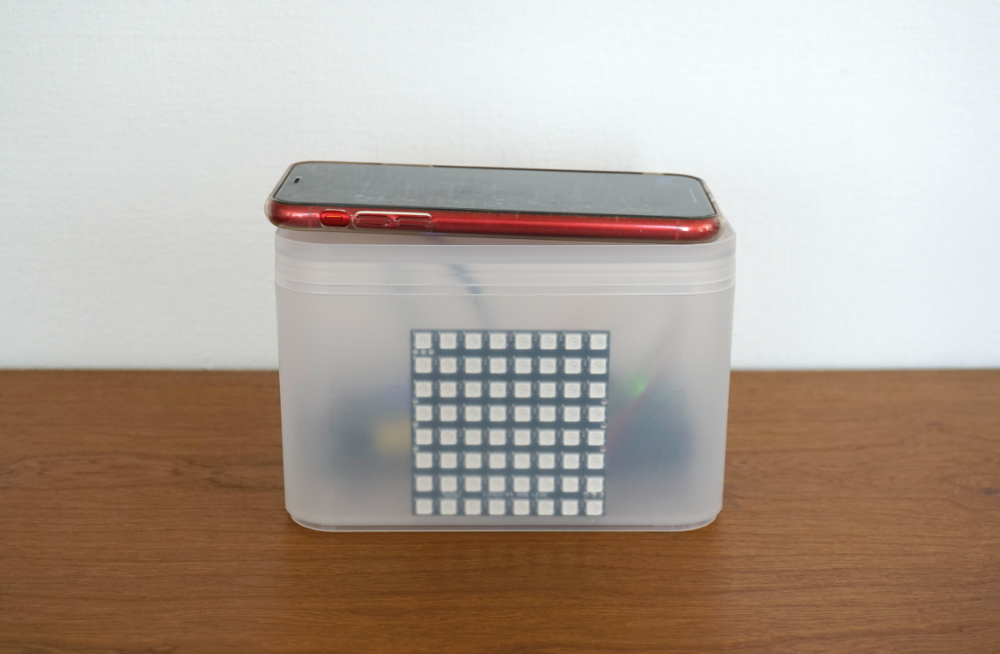
Let's watch it in the video.
First, in a slightly bright place.
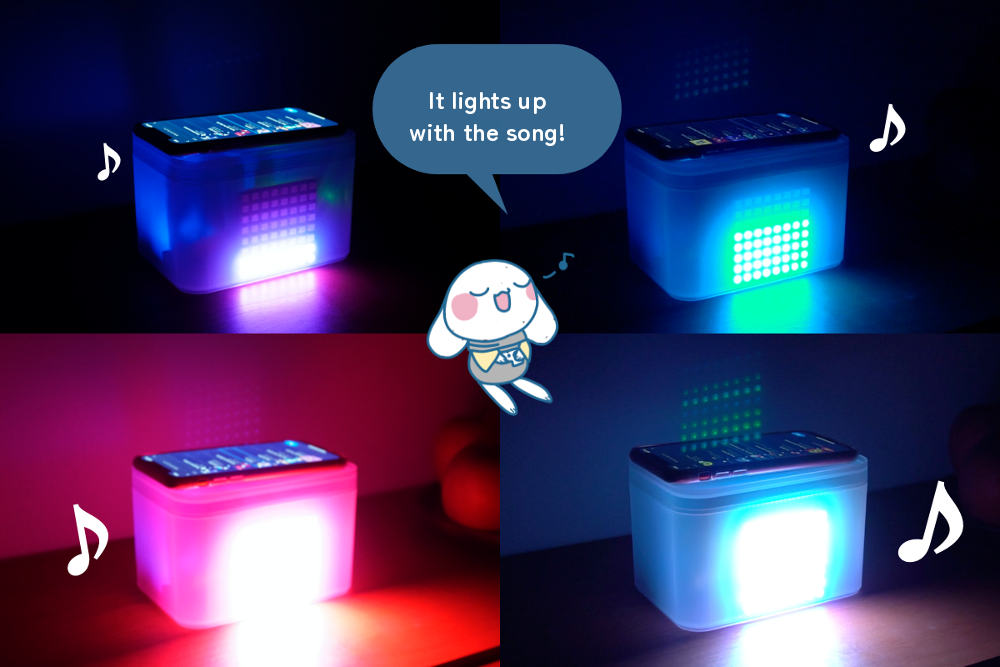
Both the brightness and which LEDs light up change with the mic's volume, so it feels really dynamic.
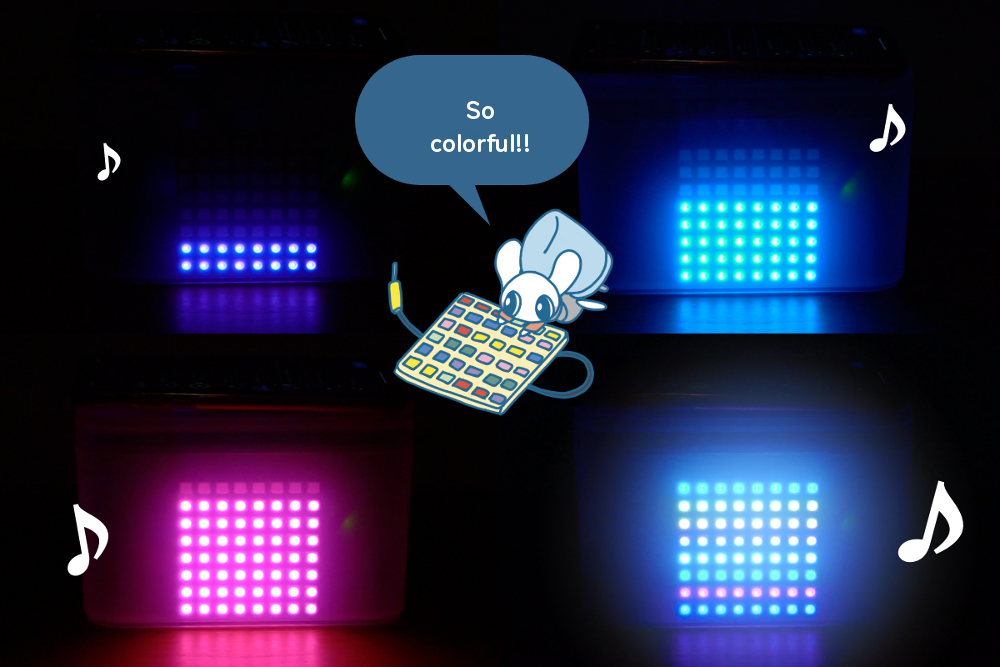
Try lots of songs and see which ones work best. Changing the colors and light patterns gives it a whole different feel. Customize it however you like to match your music and party mood!!
We thought, "It'd be nice to have a party light..." and ended up inventing our very own. Keep taking on making projects that turn the things you "want" into reality!!
