

How to Use 32x8 RGB LED Matrix Panel
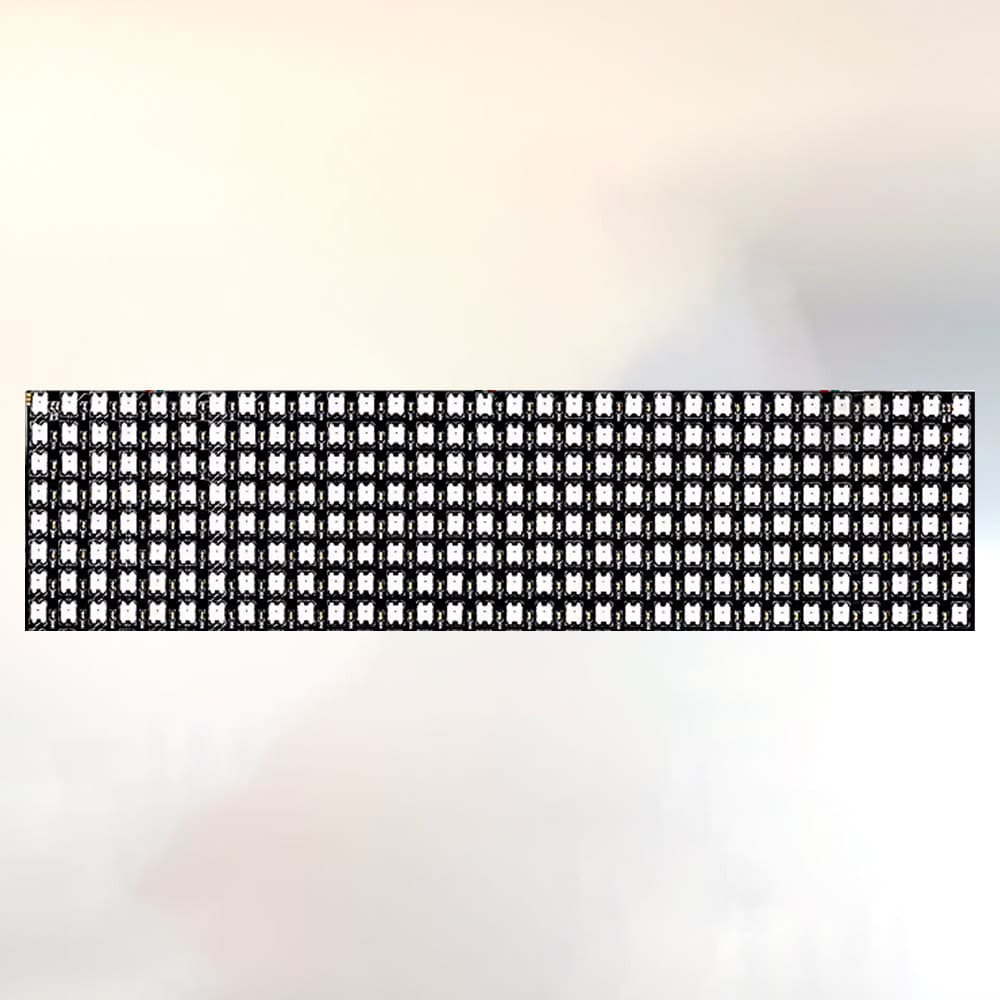
It is a wide panel with 256 full-color LEDs. You can draw pictures and letters by lighting LEDs, and since it is flexible, you can also attach it to clothes or objects to experience light fashion art.
Specifications
| Number of LEDs | 256 |
|---|---|
| Voltage | 5V |
| Size | 80 x 320 (mm) |
Setup
Basically, you can use the same wiring and programs as the 8x8 RGB LED matrix panel.
However, the order and colors of the wires are different.
When connecting with jumper wires
Connect the DIN-side wires of the 32x8 RGB LED matrix panel and the SPACEBLOCK microcontroller board as follows.
- Green wire (DIN) and the LED block-compatible pin of SPACEBLOCK
- White wire (GND) and GND of SPACEBLOCK
- Red wire (5V) and 5V of SPACEBLOCK
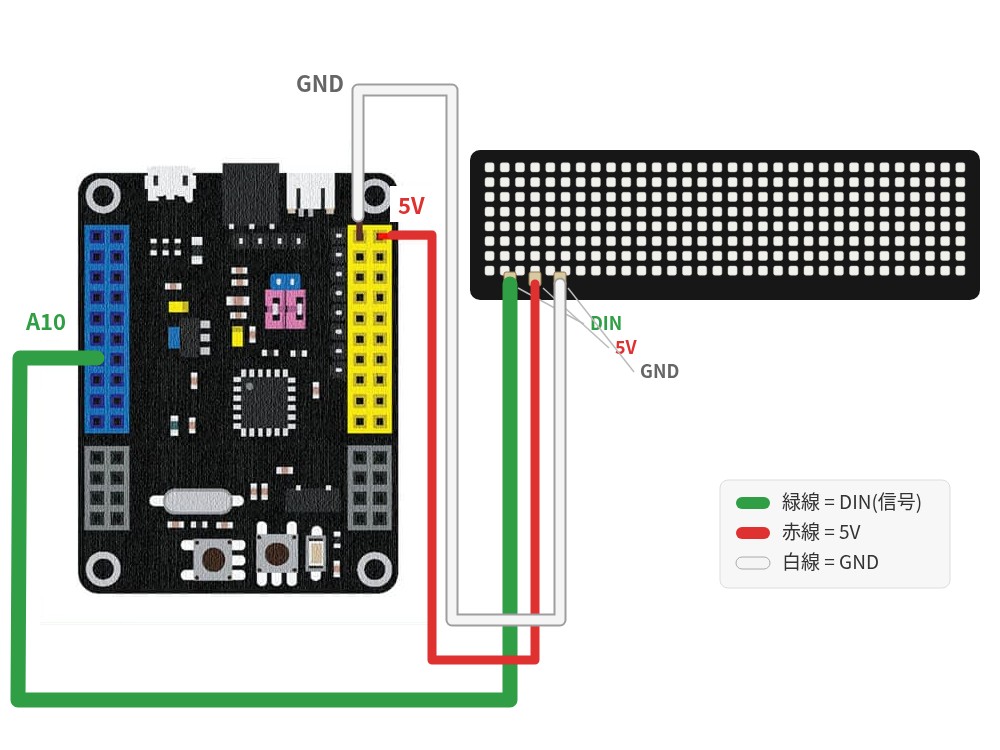
* The image shows a diagram where the signal line is connected to pin A10. LED block-compatible pins are A0, A10, B0, and B10.
* 5V and GND can also be inserted into the pins with the same notation on the SPACEBLOCK microcontroller board. The locations of the pins on the board are the same as for the 8x8 RGB LED matrix panel, so please refer to the following as well.
How to connect the 8x8 RGB LED matrix panelWhen inserting into the sideways black pin socket
You can also insert the wires into the sideways black pin socket on the SPACEBLOCK microcontroller board, which is used when inserting the 8x8 RGB LED matrix panel without jumper wires. In that case, with the sideways black pin socket facing you, insert the wires from the left in the order of "white wire (GND)", "red wire (5V)", and "green wire (DIN)".
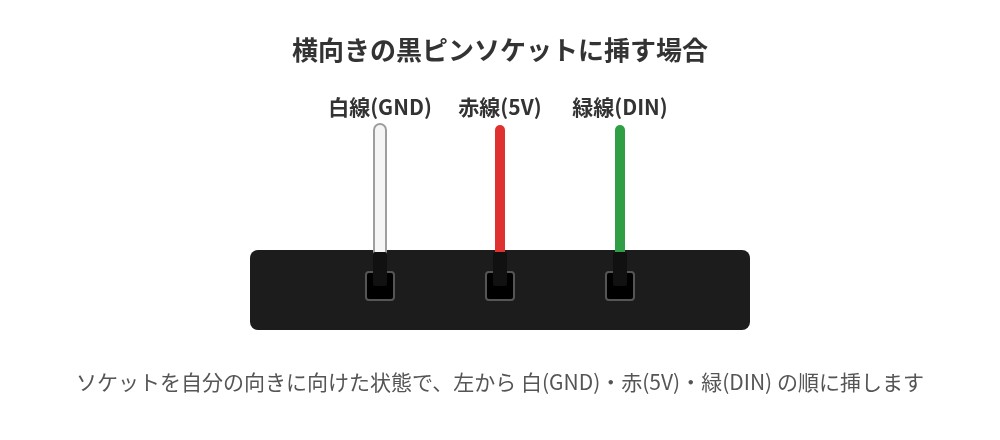
* The DOUT-side wires and the 5V and GND in the middle are used when using an external power supply or when connecting multiple LED panels. Normally, use the wires labeled DIN.
How to Use
It can be used with the same blocks as the 8x8 RGB LED matrix panel.
You can turn LEDs on and off by specifying color and lighting position with blocks in the 'LED' category of the project.
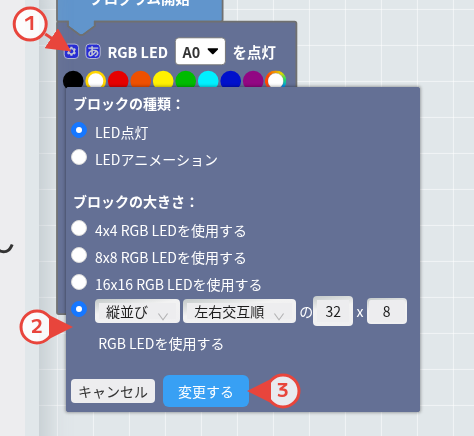
When using LED blocks, change the settings to "Vertical", "Alternate", and "32 x 8" following steps (1) to (3) in the figure below.
- (1) Click the setting (gear) icon at the top left of the block
- (2) Select "Custom input (order / size)" and set "Vertical", "Alternate", and "32 x 8"
- (3) Click "Change"
About the panel orientation
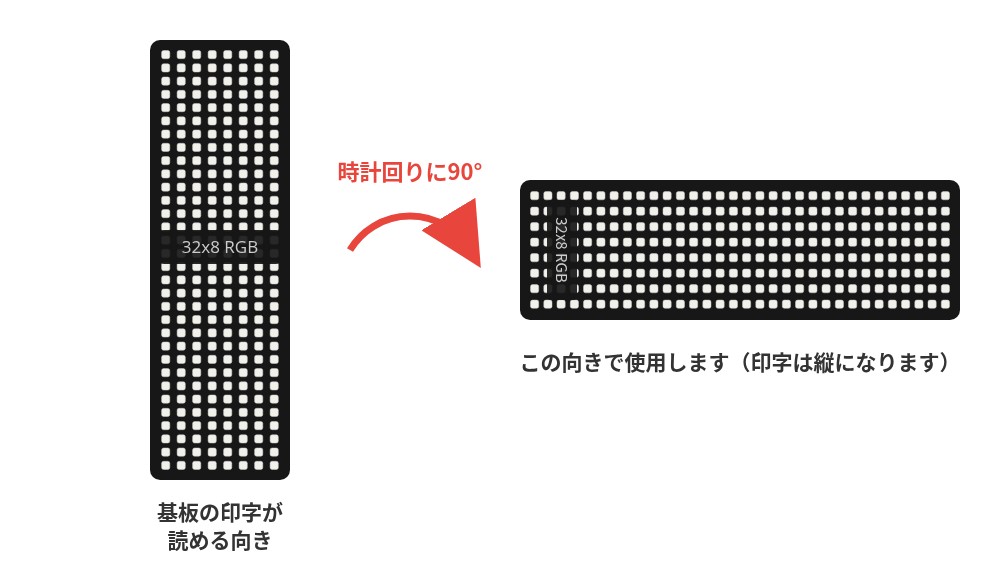
With the above "Vertical, Alternate, 32 x 8" settings, use the panel in a wide orientation rotated 90 degrees clockwise from the orientation in which the printed text on the board can be read.
For detailed usage of the blocks, click here
Light up LEDs with specified picturesTurn LEDs on and off at specified coordinates
Start or stop animations
