

[No.17] A Frog That Talks for You, Ribbit!
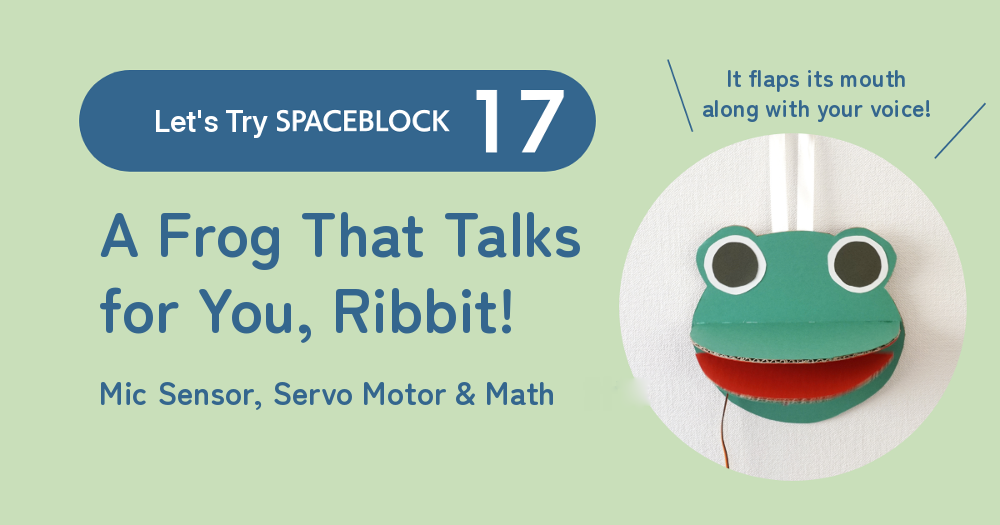
Summer vacation is almost over! We're still wearing masks in public places, and it's a little sad that we can't see each other's mouths when we talk. Let's build a device that flaps its mouth along with your voice to keep the conversation fun and cheerful!! Some of you might even just make it in time for your summer vacation project!?
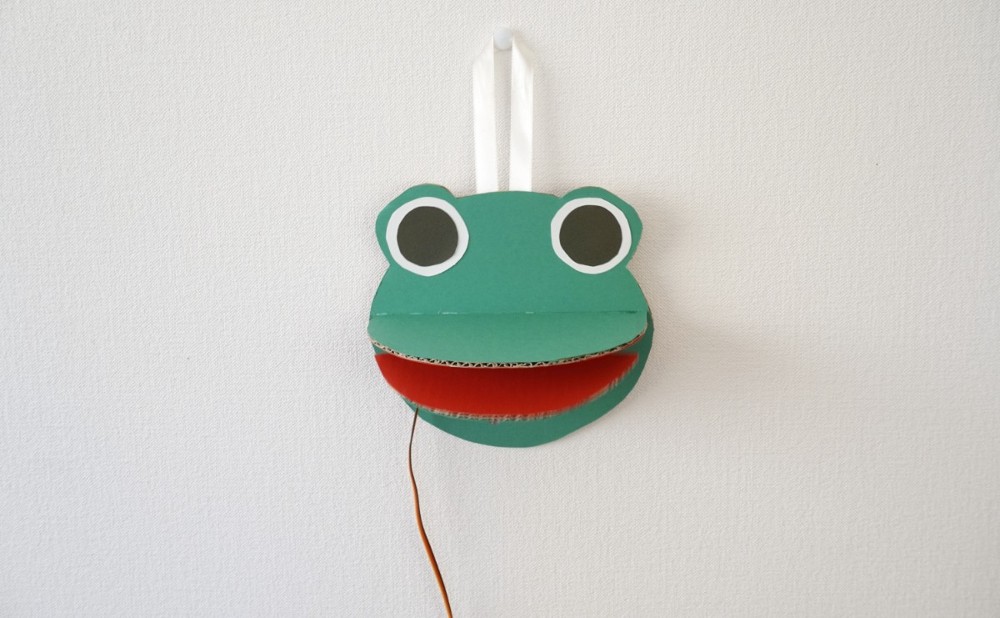
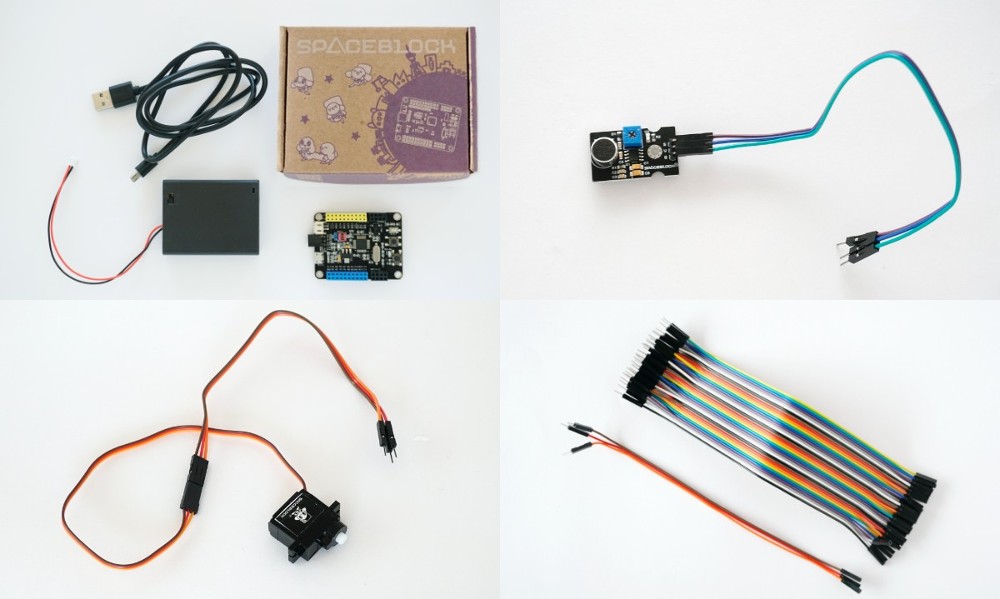
What You Need & Getting Ready
- SPACEBLOCK Standard Package [SPACEBLOCK board, USB cable, battery box]
- Microphone sensor module (mic sensor)
- 180° micro servo motor (servo motor)
- Jumper wires [3 pin header–pin socket wires × the number of wires you want to extend]
- A computer for programming
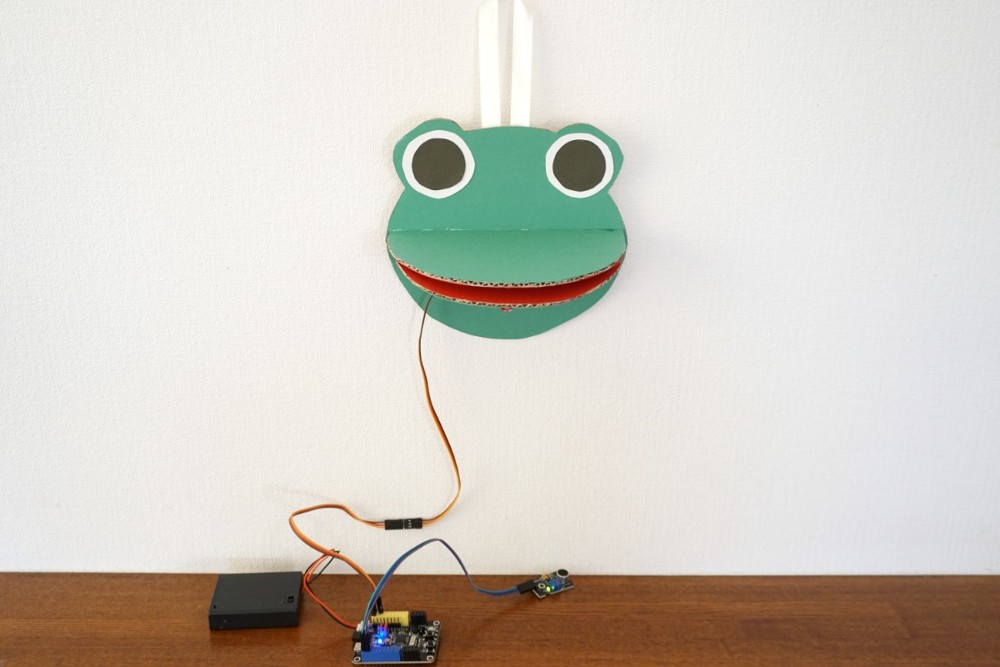
Connect the Expansion Parts to SPACEBLOCK
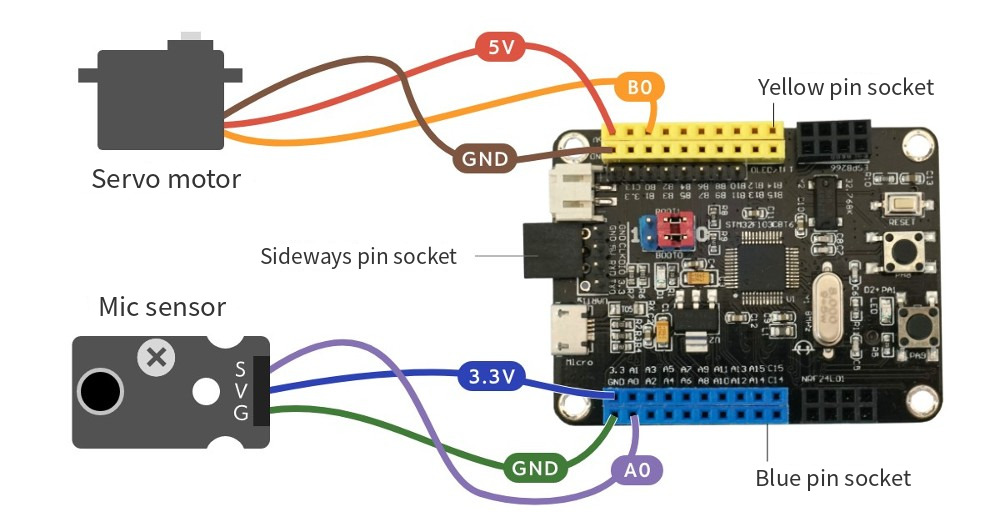
First, let's connect the mic sensor and the servo motor to SPACEBLOCK.
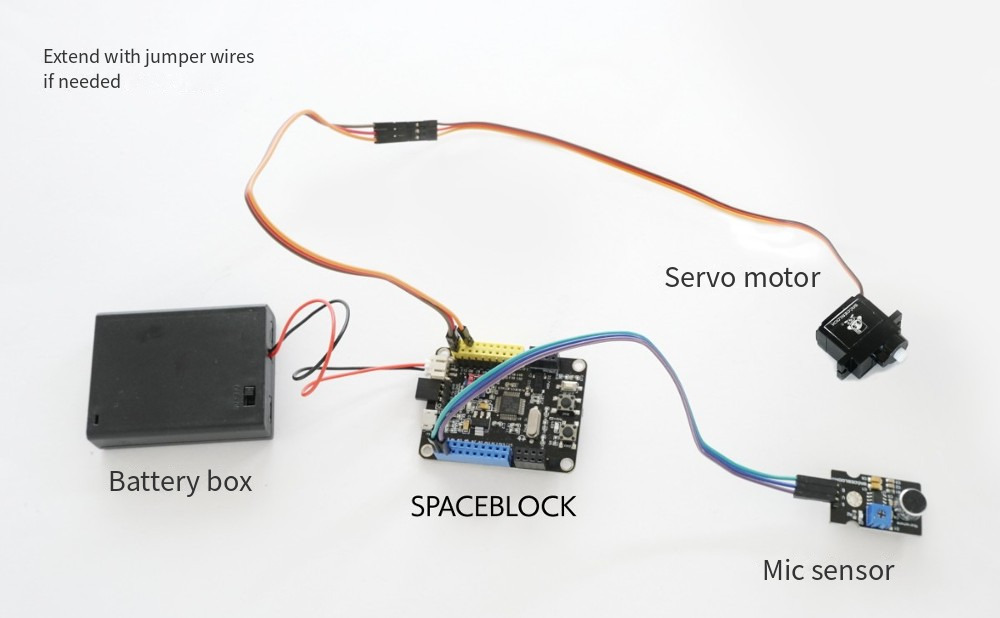
Check the details of the connections in the next picture.
Craft a Frog That Moves with a Servo Motor
First, let's make the frog craft. A servo motor can turn anywhere from 0° to 180°. This time, we planned a way for the servo to open the mouth by turning it between 0° and 90°.
Put the frog together for a test fit
First, let's look at what it will look like, test-fitted without any decorations. The servo motor moves the lower jaw part.
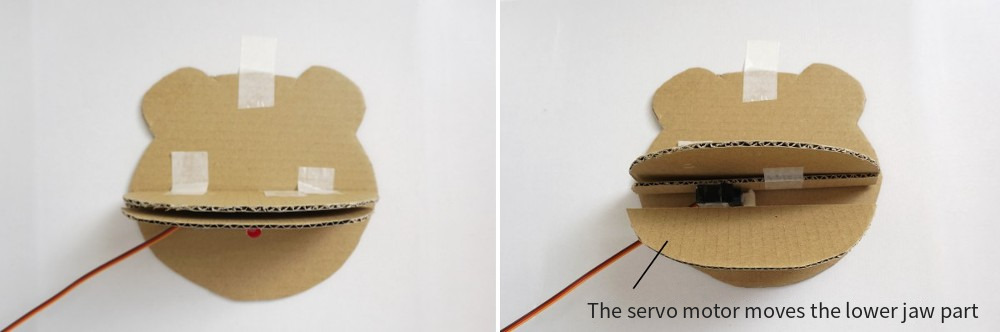
Let's go through it step by step.
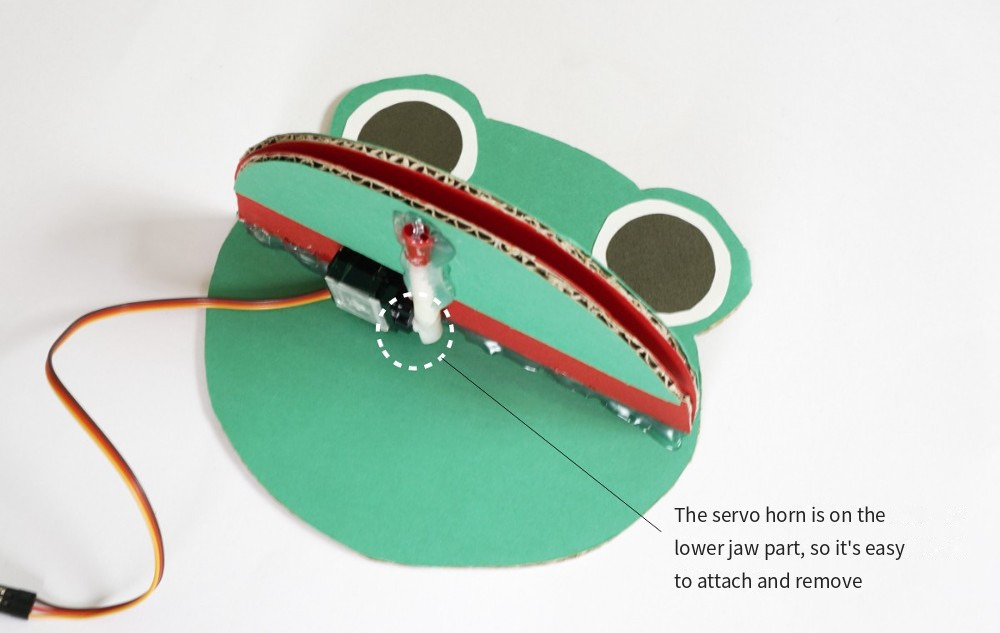
For the mouth, make the parts from cardboard as shown in the next picture. Glue a straw or something similar onto the servo horn to make it longer. Attach the servo motor body and the servo horn to their own parts. When you test-fit, it's best to hold things together with tape that peels off easily.
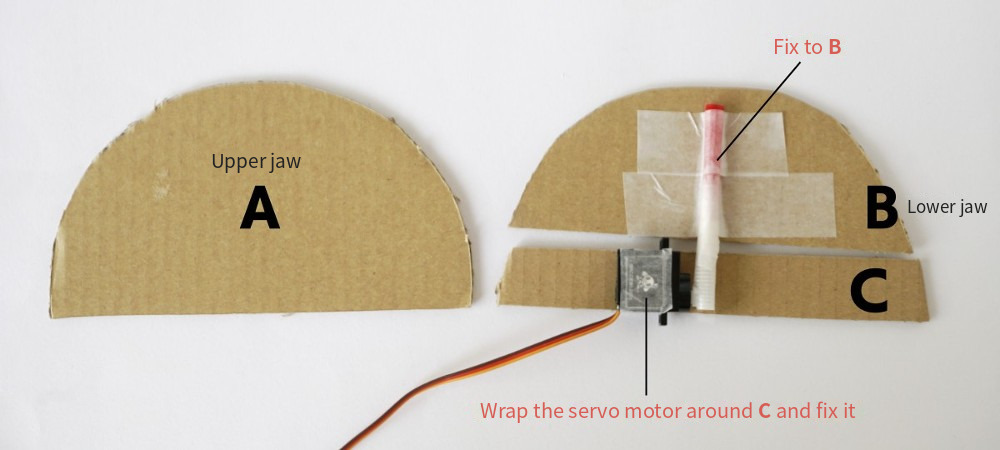
Put the parts together as shown in the next picture and fix them in place to make the mouth. Prepare a separate face-shaped part.
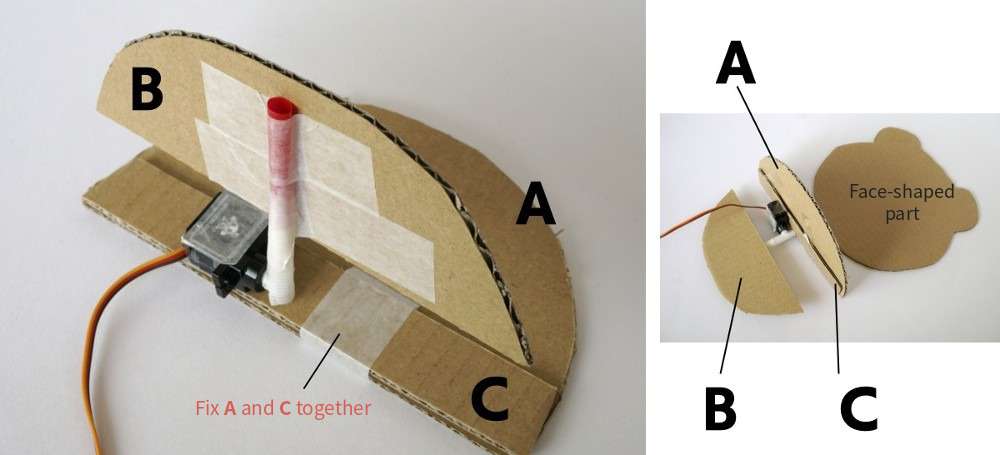
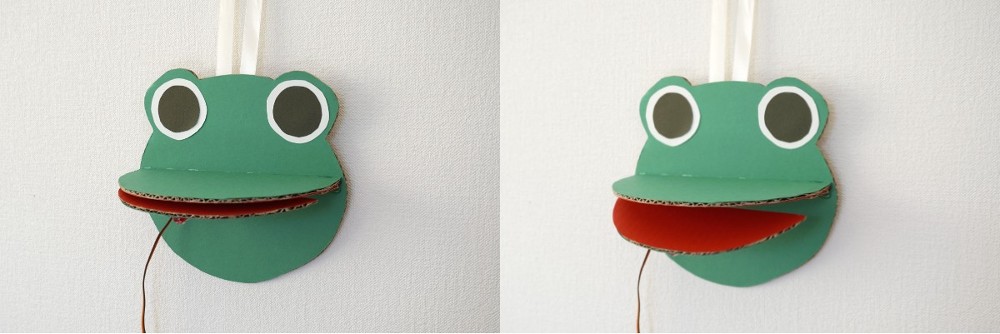
Attach the mouth to the face-shaped part so it stands straight out. When the servo motor is at 0°, the mouth is closed. At 90°, the mouth is open the widest.
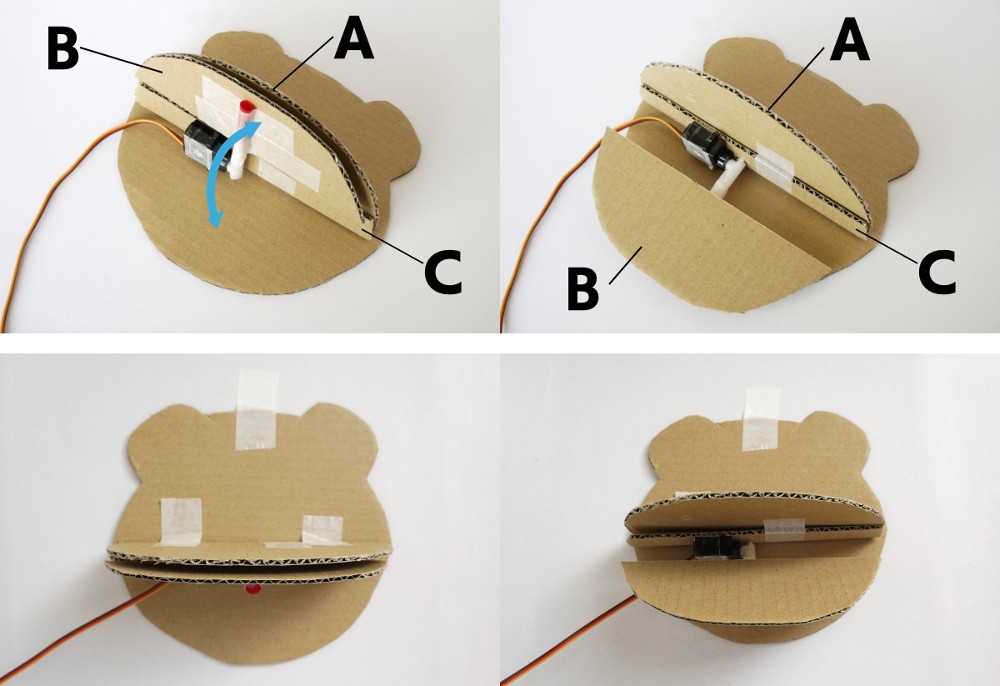
That finishes the test fit. Check that the lower jaw moves smoothly with the servo without catching on anything. If you program and test it while it's test-fitted, you can fine-tune the craft even more.
Here, we'll keep going and finish the craft.
Decorate and finish the craft
Take the test-fitted parts apart, decorate them, and put everything together for real. We glued colored construction paper that suits each part.
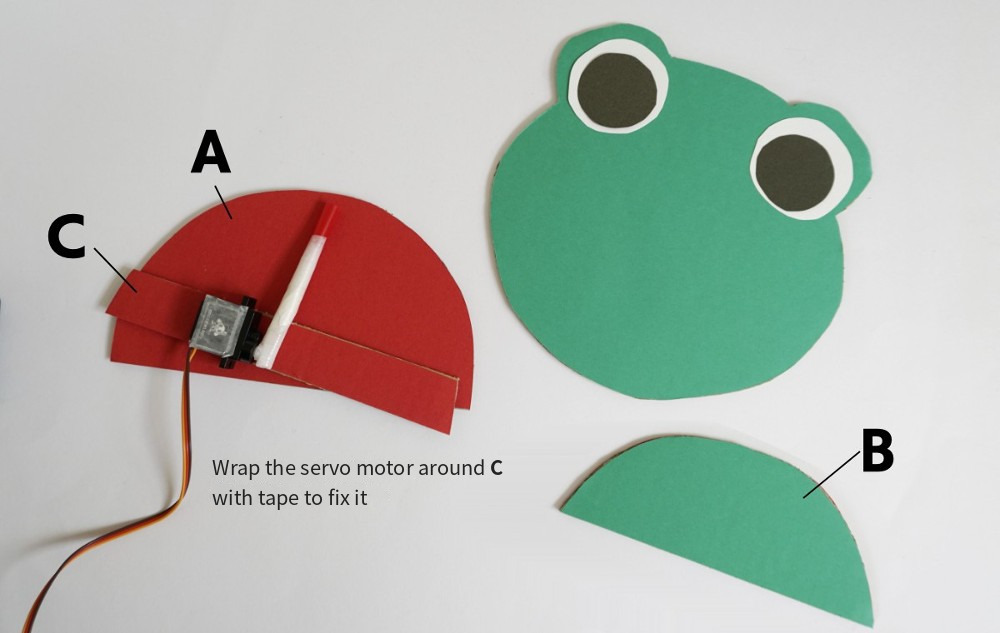
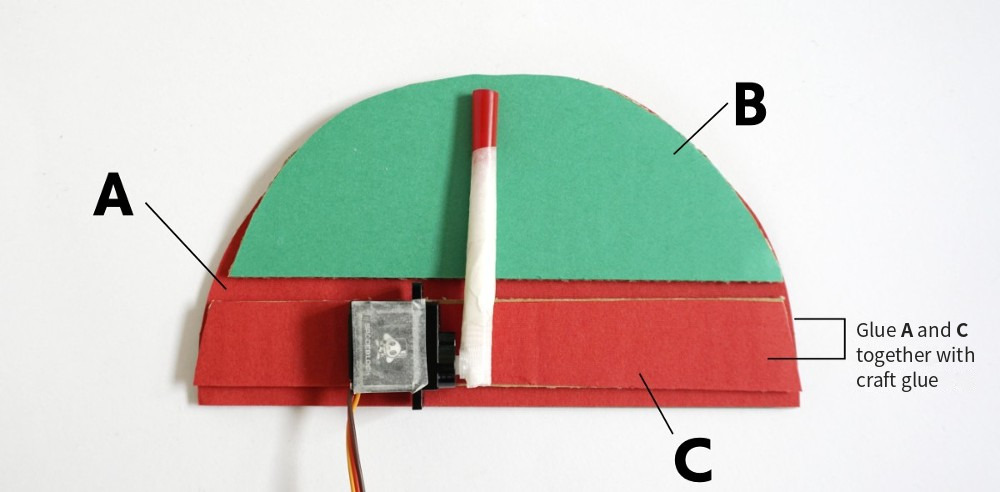
Fix the mouth parts in order, then glue them onto the face.
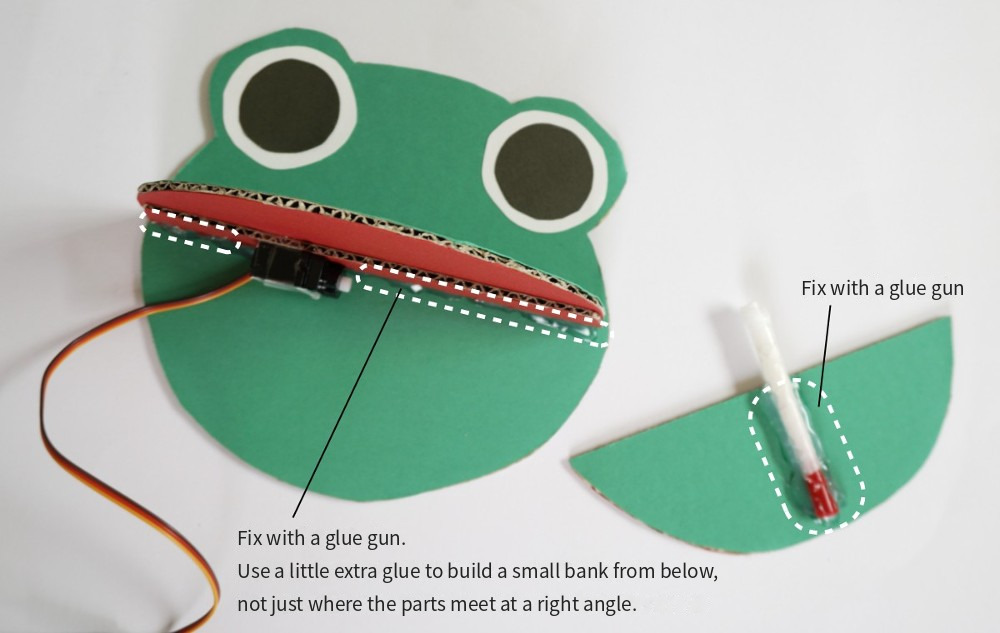
Now let's get to the most important part: the program!
How to Use the Mic Sensor and Check Its Values
In the program, the mic sensor first measures how loud the sound is. How to use the mic sensor is explained in detail in "[No.11] A Party Light That Moves with the Music!!," so here's a quick review.
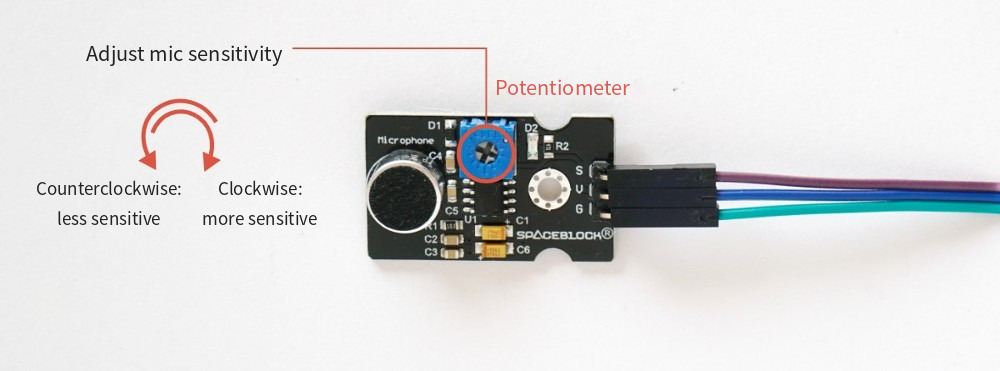
The louder the sound, the bigger the mic sensor value. The quieter the sound, the smaller the value. You can adjust the microphone's sensitivity by turning the potentiometer on the sensor with a screwdriver.
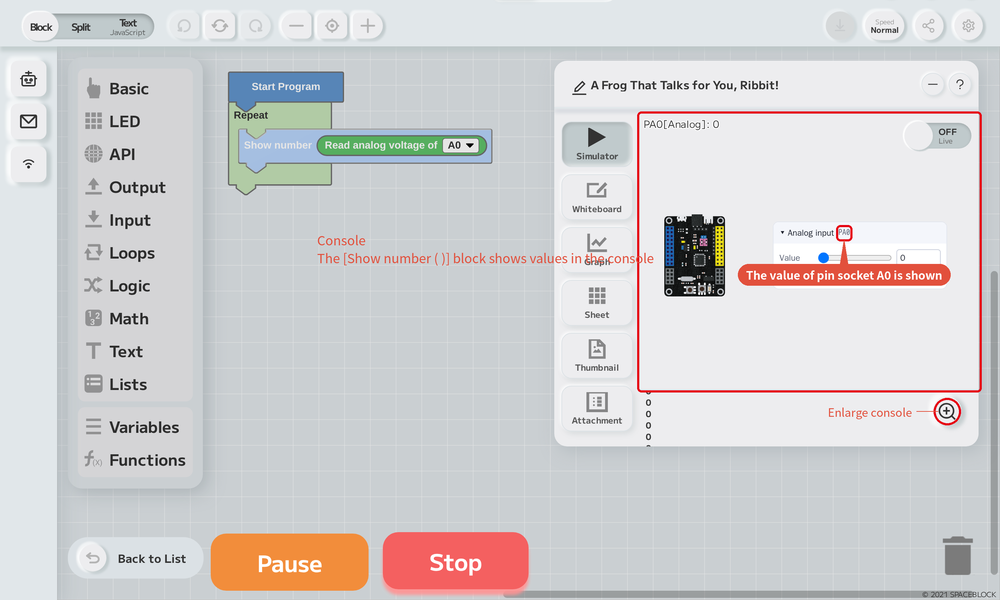
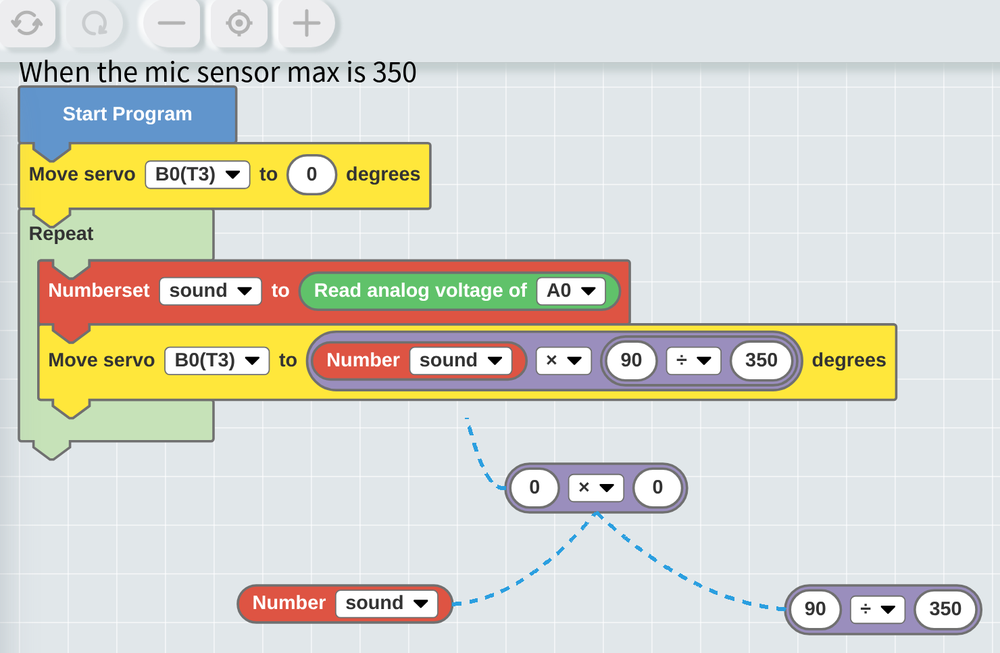
You can check the mic sensor value with the [Read analog voltage of (A0)] block in the "Input" category. Check how loud a sound gives what number.
A Program That Sets the Servo Angle Based on the Volume
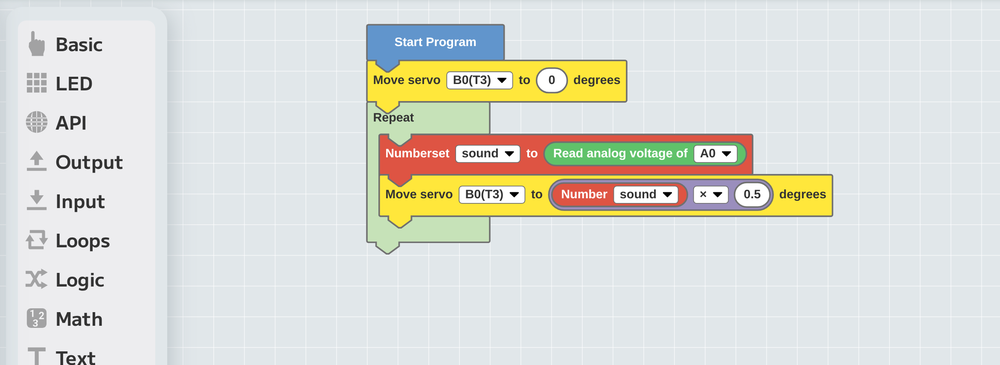
Let's go through the program from the top.
First, set the servo motor's starting angle to 0°. At 0°, the mouth is closed. Run just this part of the program to set the servo to 0°, then attach the lower jaw part to the servo motor so the mouth is closed.
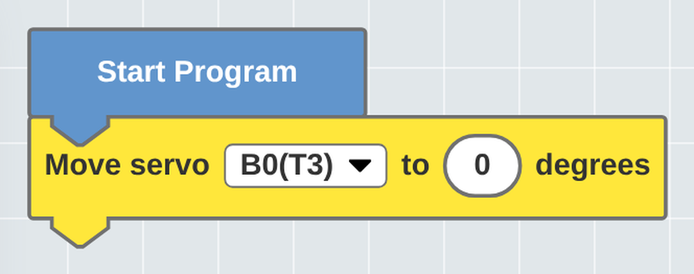
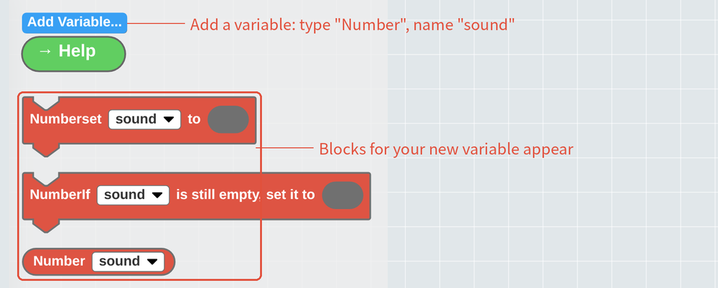
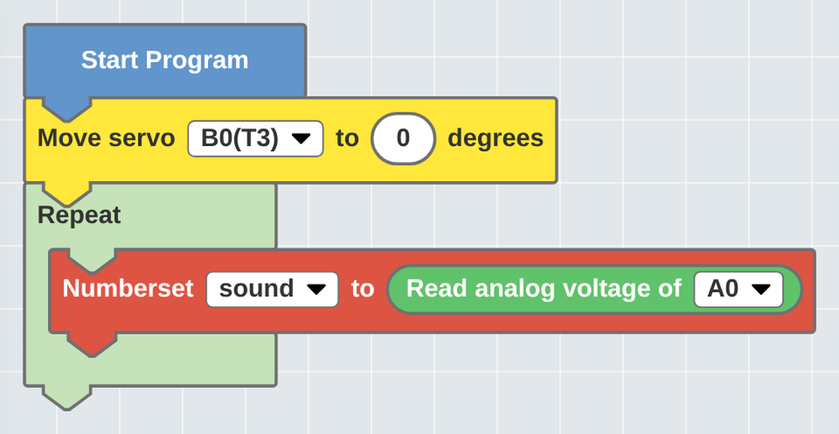
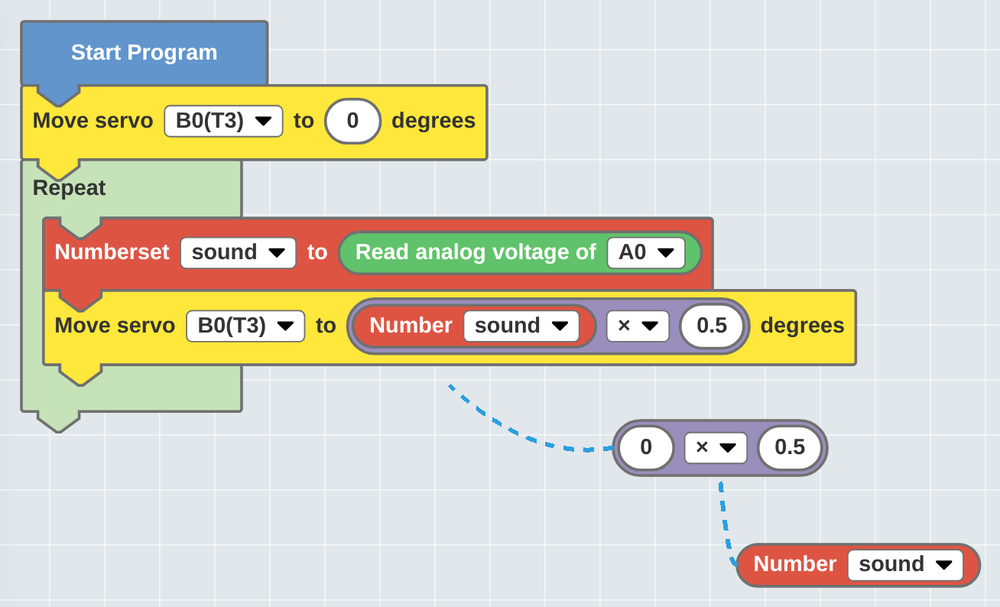
That finishes the program! It keeps reading the mic sensor value and changing the servo motor angle over and over, so while the power is on, the mouth always moves with sound.
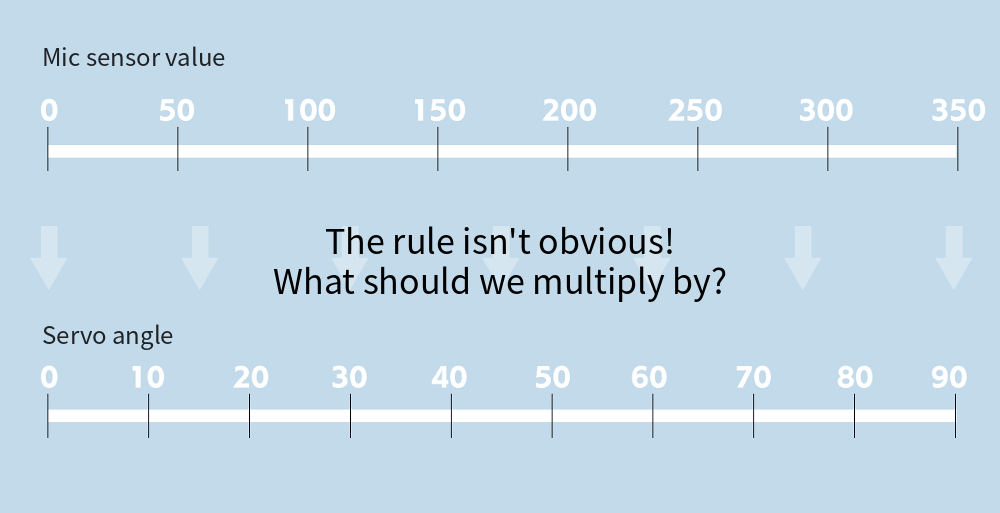
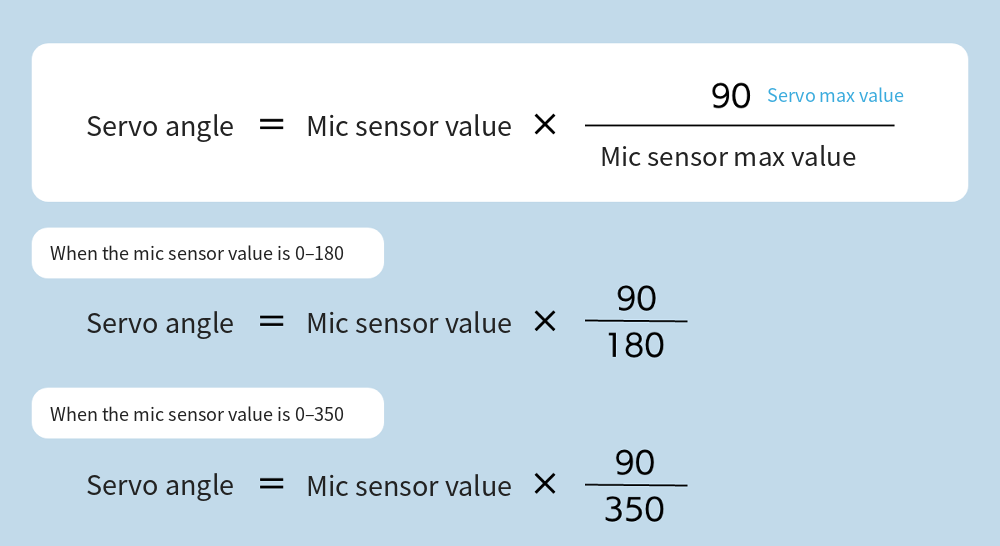
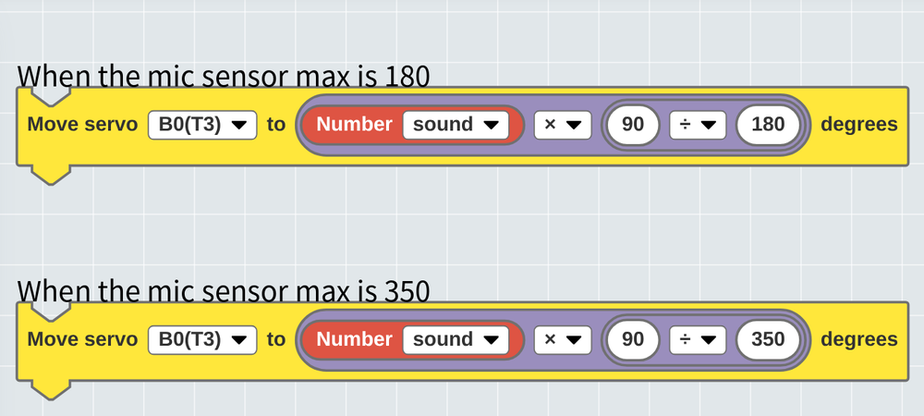
By the way, when you tested the mic sensor values, many of you probably couldn't adjust the range to 0–180. If so, check out the "Challenge!" below. You just need to change the calculation a little!
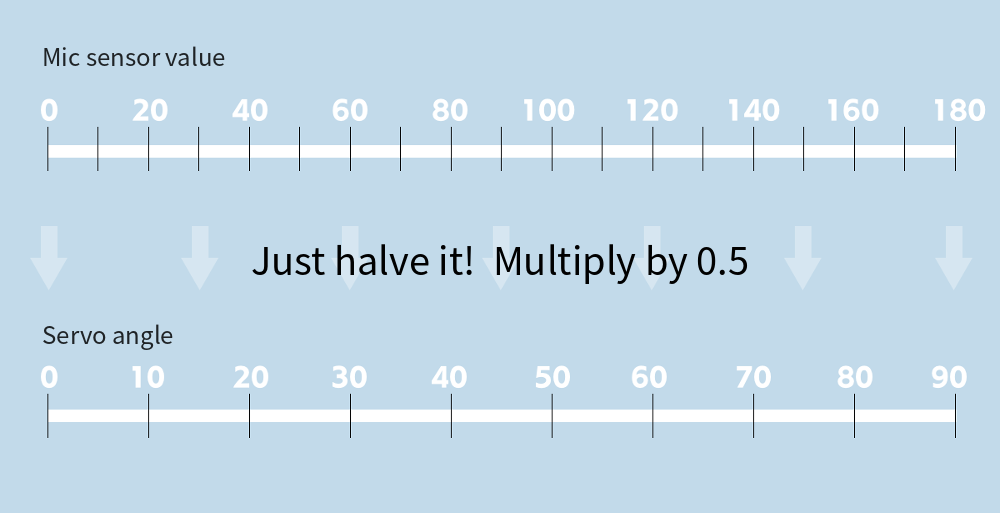
This time, we converted mic sensor values of 0–180 into servo angles of 0°–90° with a calculation. As a diagram, it looks like this.
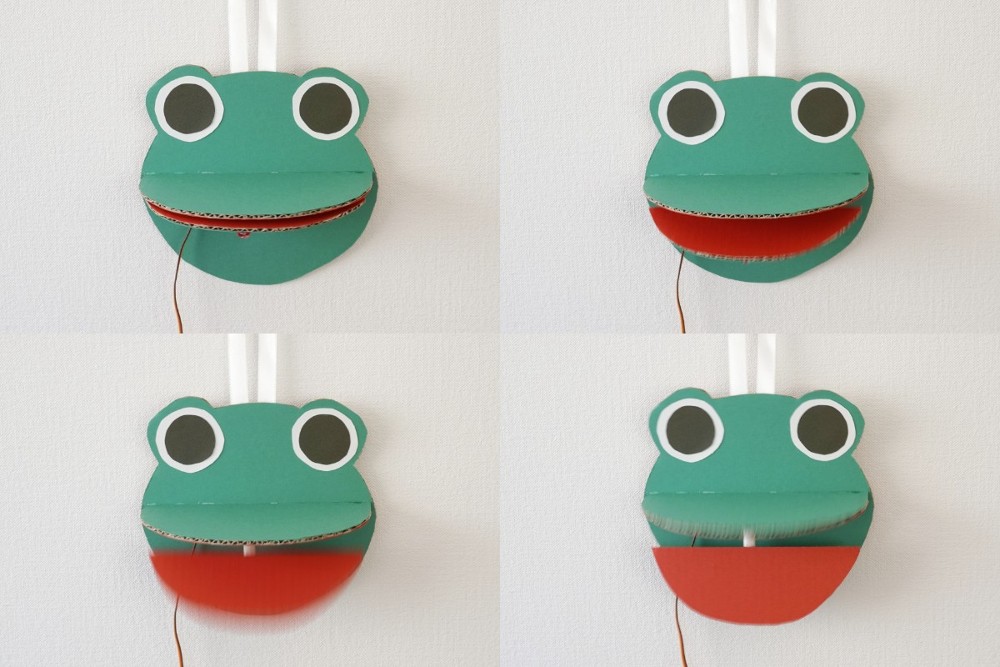
A person is talking, but it looks like the frog's movements are in sync!
